¶ Overview
smartCARS 3 is the next-generation of flight trackers designed and developed in-house by TFDi Design. Through smartCARS 3, you can track your flights for all of your virtual airlines through one application and removing the need to install multiple applications!
This document is the feature user guide for the next-generation of smartCARS, and how you can get the most out of the product.
¶ Logging In
¶ TFDi Design Login
The TFDi Design login will allow you to save your credentials for each virtual airline to save the need to log in manually every single time you start the application. It also allows you to appear on the global smartCARS traffic map.
To log in, simply use the same email address and password as https://tfdidesign.com.
Although optional, not logging in with a free TFDi Design account will prevent you from appearing on the global map and prevent the use of smartCARS Pro features.
¶ Logging into Pro
After logging in (or skipping the login) for TFDi Design, you'll be presented with a choice of how you are choosing to fly with smartCARS. Choosing "On my own" will take you to smartCARS Pro as long as you have an active smartCARS Pro subscription. Choosing "With a community" will take you to the airline selection list.
If you have logged in with a virtual airline, this screen will also show your most recent login, so that you can get flying faster.
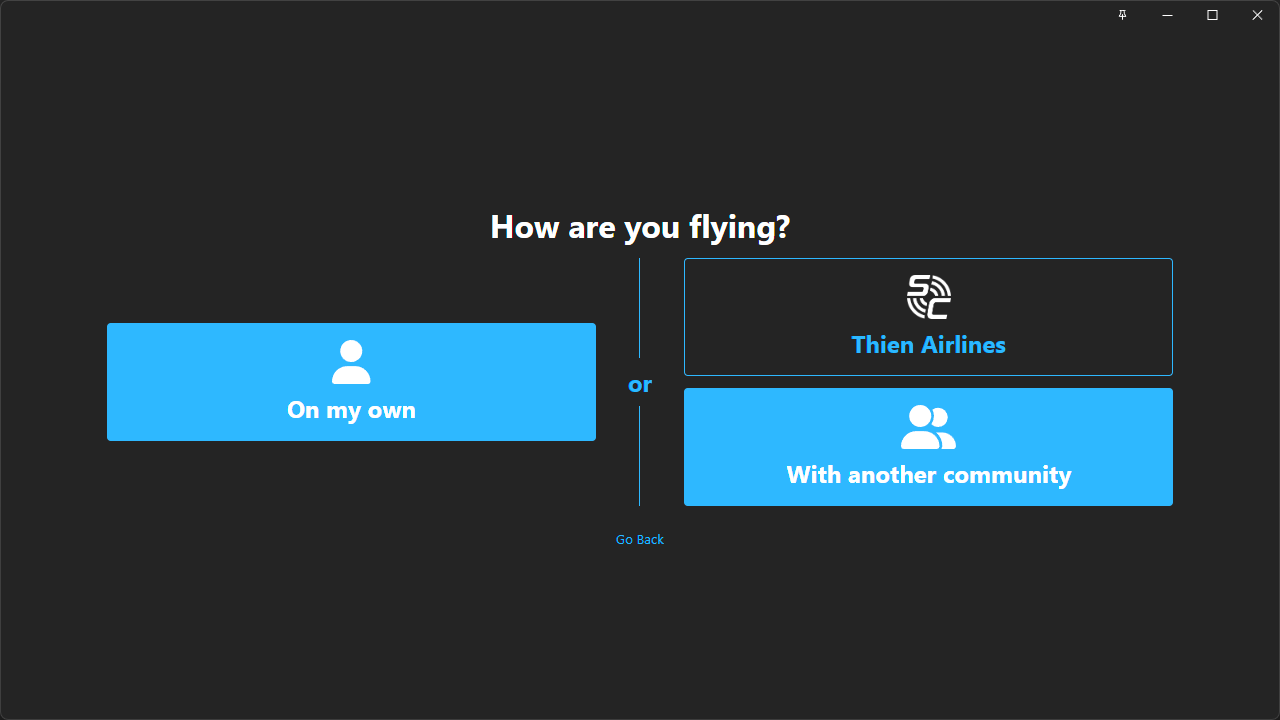
If you do not have a smartCARS Pro subscription, pressing the "On my own" button will redirect you to the smartCARS 3 product page, where a Pro subscription can be purchased.
¶ Logging into your virtual airline
TFDi Design official virtual airline partners will have front-page advertisement after the community option is selected. If you belong to one of our virtual airline partners, you can simply click the logo and log in with your VA credentials - what you use on their website.
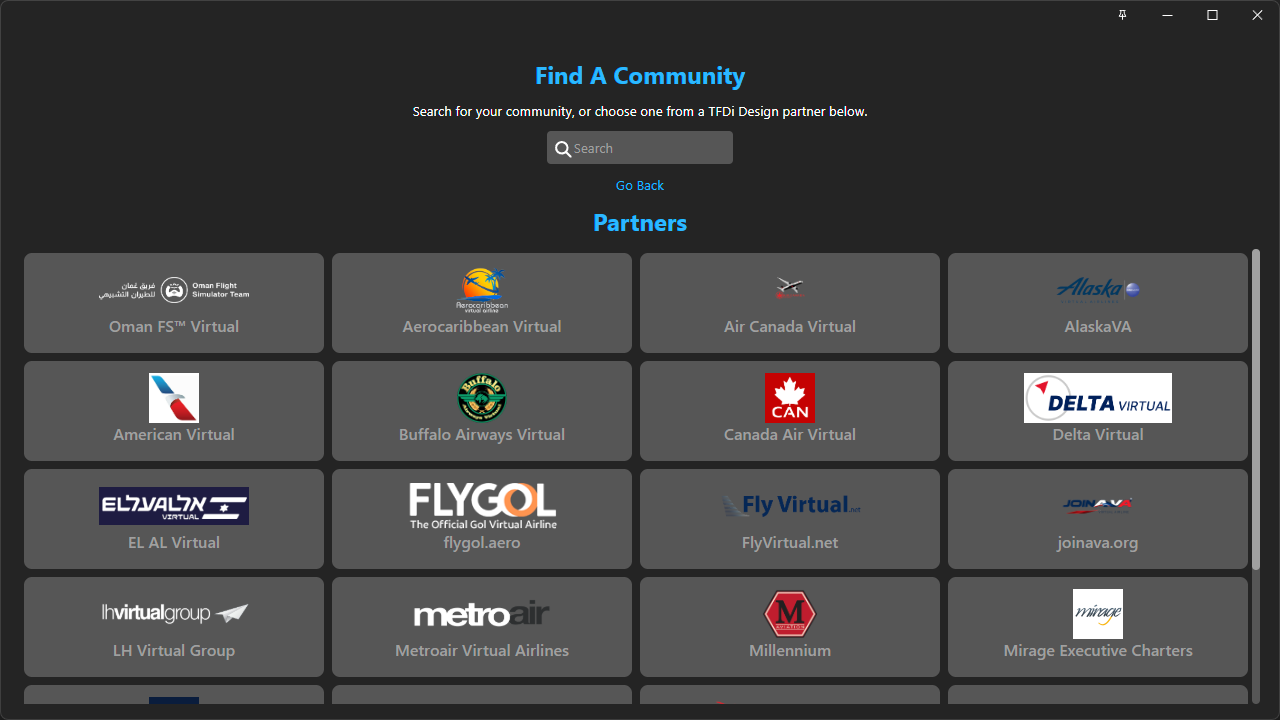
If you do not belong to a partner virtual airline, you can search by name or URL in the search box above the partner logos.
Below, you will see the login screen for your virtual airline. It will be adorned in the airline's pre-selected colour, that the licence owner can change if they wish. Use your credentials for your virtual airline to get access to the flight tracking features.
Again, we recommend checking "Remember Me" to save logging in each time, and "Create a Desktop Shortcut" if you use that virtual airline regularly. Just like in smartCARS 2, you will see their logo on your desktop, and running the shortcut will take you straight to the virtual airline! This will bypass the virtual airline selector to reduce the time it takes to start your flights!
The information associated with the "Remember Me" checkbox will be stored for a period of 7 days from the last use. If you have not flown for the virtual airline for over a week, you will be prompted to log back in.
¶ Navigating the Application
The application consists of four major components:
¶ The Side Menu
The side menu is how you access individual "plugins", or components that add functionality to smartCARS. In the picture below, the buttons on the side are as follows, starting with the blue smartCARS icon.
 |
Top
|
¶ The Top bar
The top bar will show your simulator connection status and allow you to pin the application to the top with the thumbtack icon.

This status message will also indicate if there was a problem starting your flight such as:
- Bid not found (you should find a flight first)
- Multiple bids (you need to select one)
- Issues with the virtual airline (community rejection)
- No aircraft found (your bid does not have a valid aircraft)
¶ The Bottom Bar

The bottom bar provides quick access to Sky Blue Radio, the premier online flight simulation radio station. It also provides a link to access the smartCARS Mobile Experience and a help button
¶ The Content Area
The center of the application is where plugins will be displayed. Outside of the Pilot Center, all content in the Content Area is created entirely by the plugin you have selected.
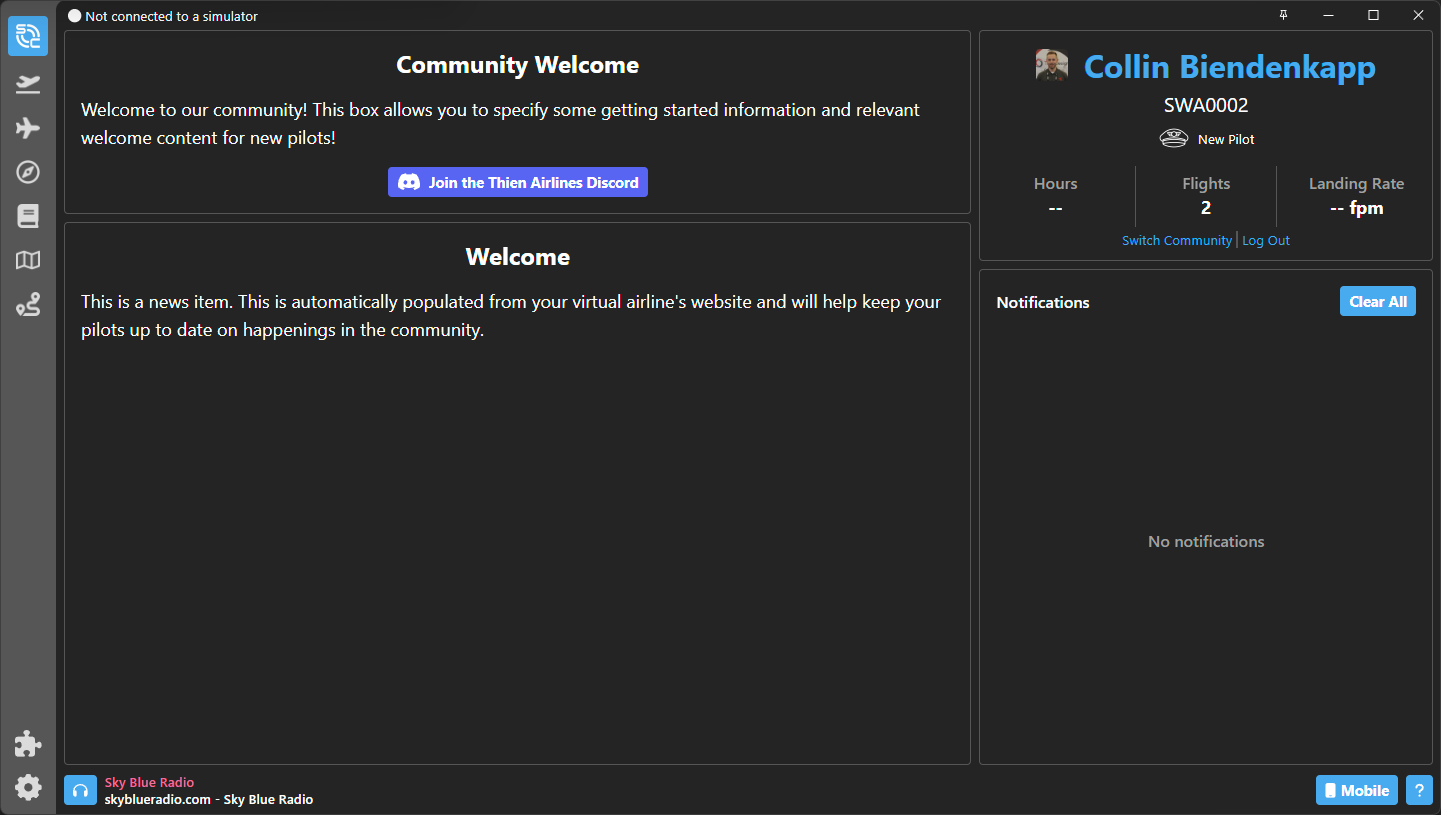
¶ Pilot Center
When logged in, every pilot will be presented with a section known as the "Pilot Center". In here, you will see a welcome note from your virtual airline, as well as some of your own statistics from the VA. It will include hours flown, flights completed and your average landing rate.
If available, the latest VA news will also be shown here.
Pilots will also have a notifications section, which can include a wide variety of notifications from various plugins.
At the bottom of the screen, you will see the players for Sky Blue Radio to keep you entertained in the virtual skies!
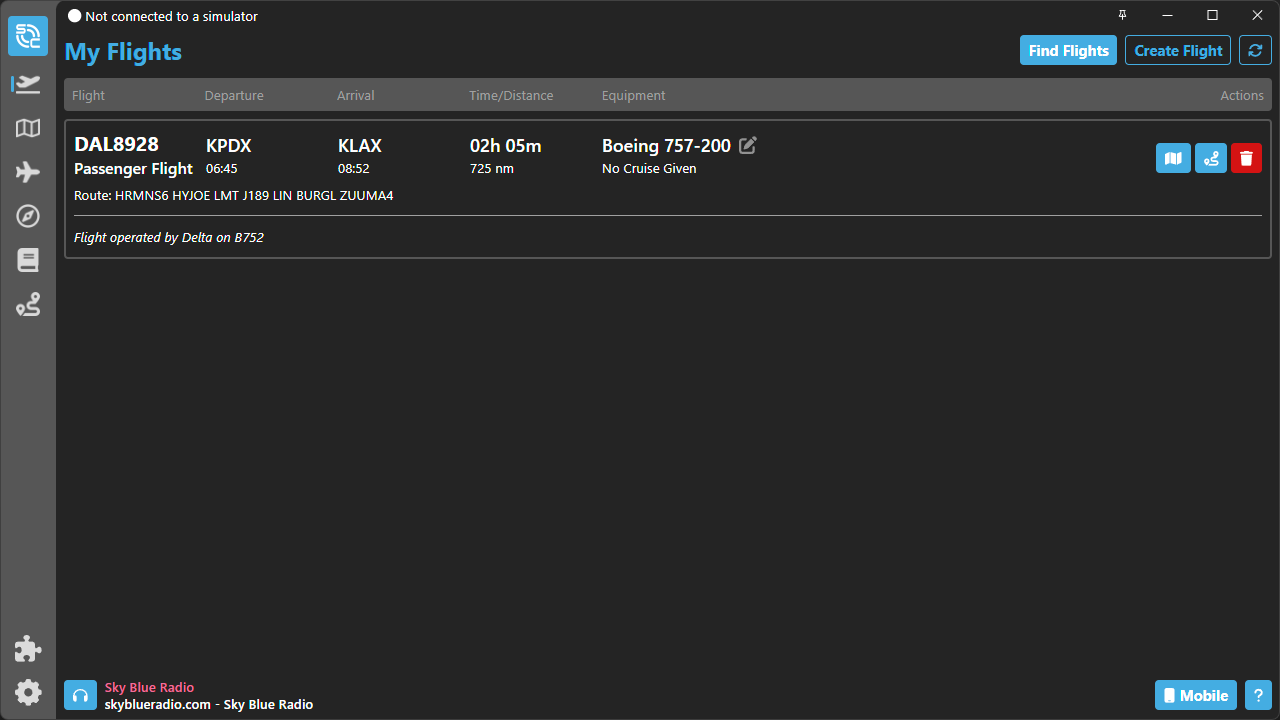
¶ Flight Center
The aeroplane icon in the menu indicates the Flight Center. Here, you will be able to view your flights that you have bid on, create a charter flight (if allowed by the VA), or find a flight to bid on.
¶ Finding a new flight:
- Click "Find Flights"
- Find a flight in the list, or filter your search by selecting a departure airport, arrival airport, aircraft or callsign. These will be populated by your virtual airline.
- Click on the "+" icon, or if you have SimBrief installed, you can plan with SimBrief directly from here
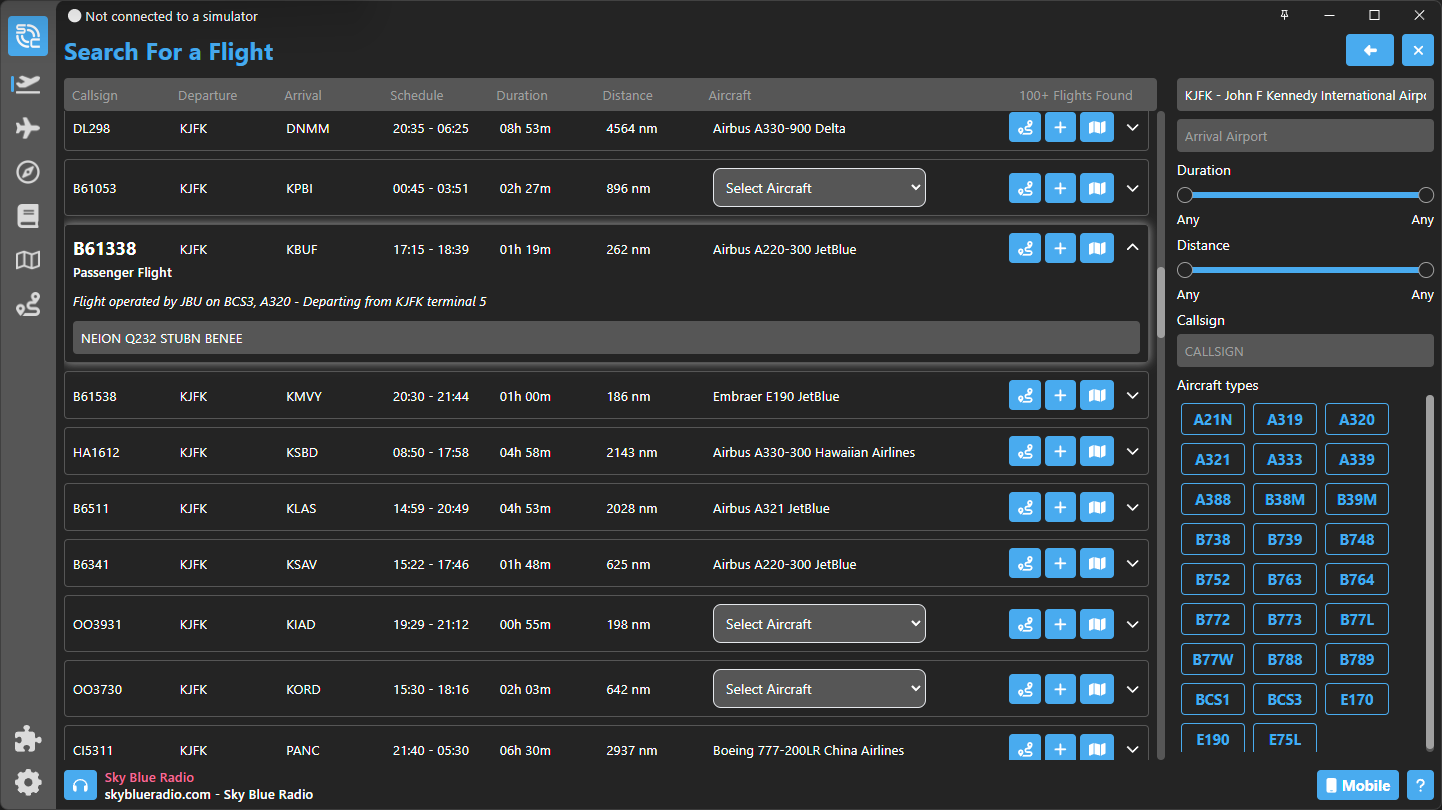
You can view a preview of a flight on a map by clicking the map icon
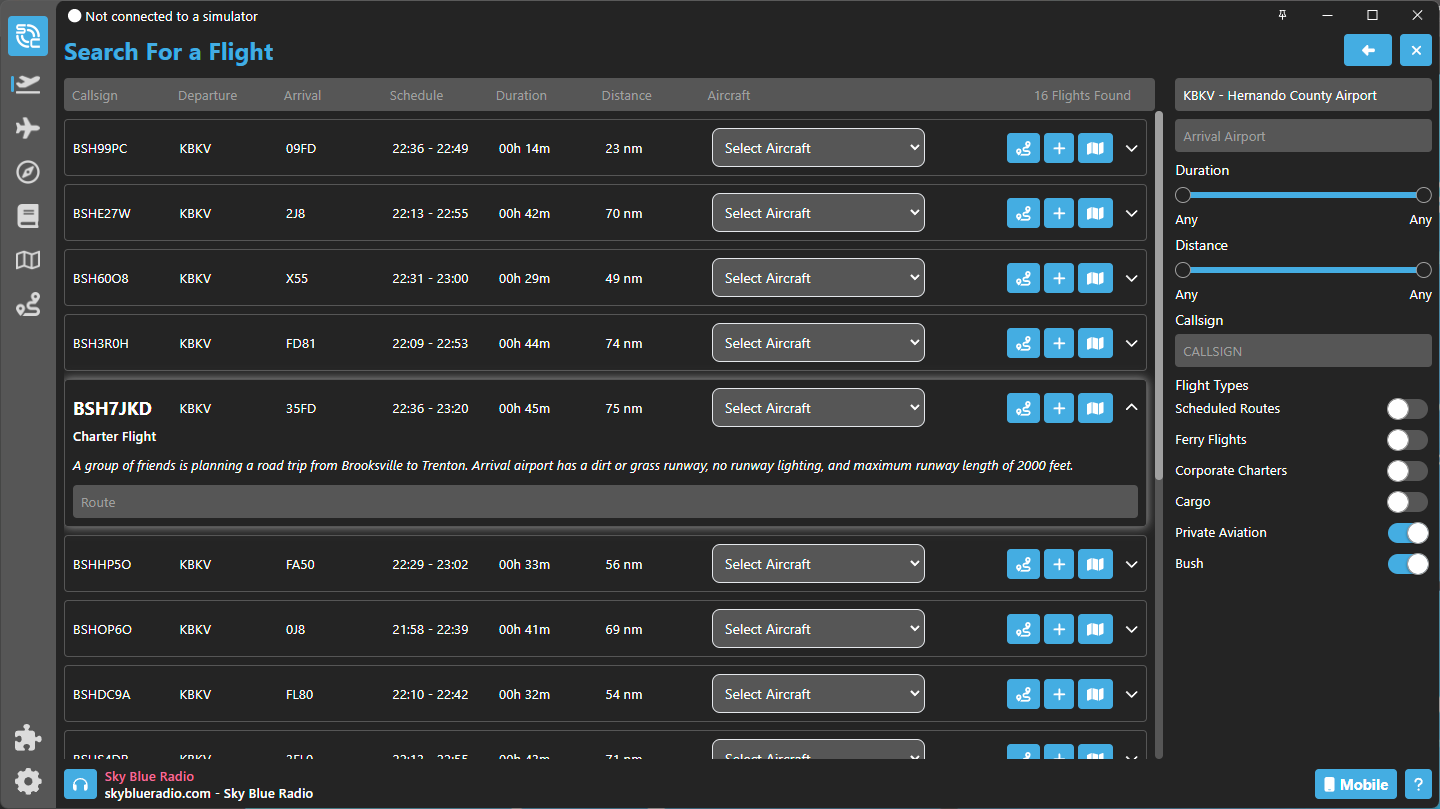
As a Pro user, you can search for custom flight types such as bush flights, corporate/charter contracts, and more.
Once back on the flight page, buttons appear on the right side of the flight. You can delete the bid, view it on a map, or plan it with SimBrief.
By clicking "Create Flight", pilots can make use of the charter system within smartCARS 3. From the images below, pilots can fill in the callsign, aircraft type, flight type, cruise level, departure and arrival airports, departure and arrival times, and the route.
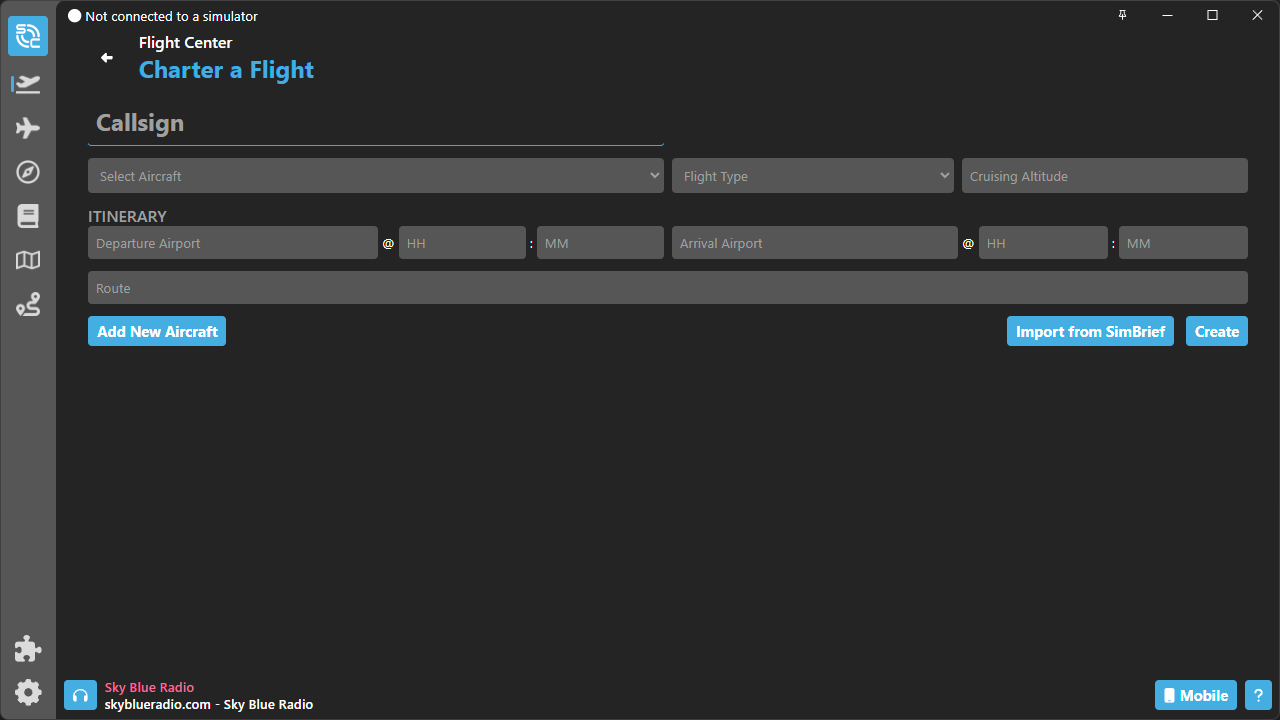
Once all information has been entered, clicking "Create" will then take you back to the Flight Center.
¶ Flight Tracking
Starting a flight with smartCARS 3 is automated. Once a flight is booked, simply start flying and tracking will begin.
![]()
Pro users can choose to restore a flight if their simulator, smartCARS, or even computer crashes. That function is available via the "Restore" button, for this to work the user will need to load back in at their departure airport. The function will look something like this:
![]()
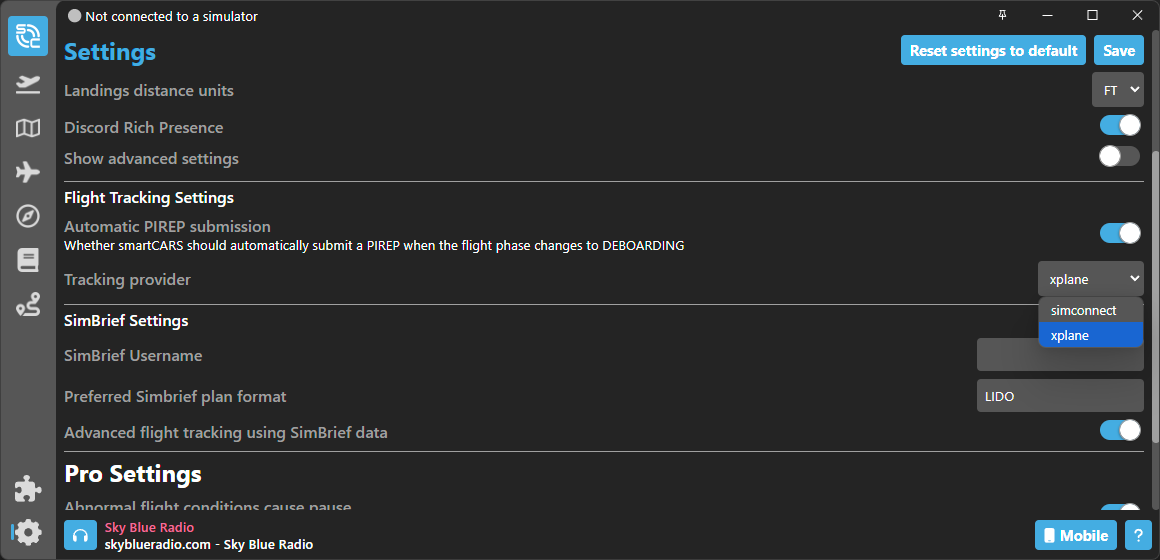
¶ Flying with X-Plane
smartCARS fully supports X-Plane without the use of XPUIPC. To fly with X-Plane, navigate to the settings page and select 'xplane' as the tracking provider.
¶ Running smartCARS and your simulator on different computers
¶ For FSX, P3D, MSFS, or FS24
You will need to manually configure SimConnect if you're running the simulators on different computers.
On the machine where your simulator is running:
- Locate your
SimConnect.xmlfile. The location can vary depending on which simulator you are using. The file also may not exist, in which case you need to create it.
The location for SimConnect.xml is usually:
%APPDATA%\\Lockheed Martin\\Prepar3D vX\\SimConnect.xmlfor P3DvX%APPDATA%\\Microsoft Flight Simulator\\SimConnect.xmlfor MSFS 2020 on Steam%LOCALAPPDATA%\\Packages\Microsoft.FlightSimulator_8wekyb3d8bbwe\\LocalCache\\SimConnect.xmlfor MSFS 2020 using Microsoft Store/Xbox%APPDATA%\\Microsoft Flight Simulator 2024\\SimConnect.xmlfor MSFS 2024 on Steam%LOCALAPPDATA%\\Packages\\Microsoft.Limitless_8wekyb3d8bbwe\\LocalCache\\SimConnect.xmlfor MSFS 2024 using Microsoft Store/XBox
Edit the SimConnect.xml file to allow remote connections into the PC, this should look like the following (there may be other entries in the file):
<SimConnect.Comm>
    <Descr>Static IP4 port</Descr>
    <Protocol>IPv4</Protocol>
    <Scope>local</Scope>
    <Port>5111</Port>
    <MaxClients>64</MaxClients>
    <MaxRecvSize>41088</MaxRecvSize>
    <Address>0.0.0.0</Address>
</SimConnect.Comm>
Identify the IP address of the machine running the simulator (this depends on your local network setup). We suggest looking at a guide for how to do this for your situation.
On the machine where smartCARS is running:
- Enter the IP address of the machine where the simulator is running and the port where SimConnect is running (in this example it is 5111)
Here is a full SimConnect.xml file as an example:
<?xml version="1.0" encoding="Windows-1252"?>

<SimBase.Document Type="SimConnect" version="1,0">
    <Descr>SimConnect Server Configuration</Descr>
    <Filename>SimConnect.xml</Filename>
    <SimConnect.Comm>
        <Descr>Static IP4 port</Descr>
        <Protocol>IPv4</Protocol>
        <Scope>local</Scope>
        <Port>5111</Port>
        <MaxClients>64</MaxClients>
        <MaxRecvSize>41088</MaxRecvSize>
        <Address>0.0.0.0</Address>
    </SimConnect.Comm>
    <SimConnect.Comm>
        <Descr>Static IP6 port</Descr>
        <Protocol>IPv6</Protocol>
        <Scope>local</Scope>
        <Port>501</Port>
        <MaxClients>64</MaxClients>
        <MaxRecvSize>41088</MaxRecvSize>
    </SimConnect.Comm>
    <SimConnect.Comm>
        <Descr>Custom Pipe</Descr>
        <Protocol>Pipe</Protocol>
        <Scope>local</Scope>
        <Port>Custom\SimConnect</Port>
        <MaxClients>64</MaxClients>
        <MaxRecvSize>41088</MaxRecvSize>
    </SimConnect.Comm>
    <SimConnect.Comm>
        <Descr>Dynamic IP4 port</Descr>
        <Protocol>IPv4</Protocol>
        <Scope>local</Scope>
        <Port>0</Port>
        <MaxClients>64</MaxClients>
        <MaxRecvSize>41088</MaxRecvSize>
    </SimConnect.Comm>
    <SimConnect.Comm>
        <Descr>Dynamic IP6 port</Descr>
        <Protocol>IPv6</Protocol>
        <Scope>local</Scope>
        <Port>0</Port>
        <MaxClients>64</MaxClients>
        <MaxRecvSize>41088</MaxRecvSize>
    </SimConnect.Comm>
    <SimConnect.Comm>
        <Descr>Default FSX Pipe</Descr>
        <Protocol>Pipe</Protocol>
        <Scope>local</Scope>
        <Port>0</Port>
        <MaxClients>64</MaxClients>
        <MaxRecvSize>41088</MaxRecvSize>
    </SimConnect.Comm>
</SimBase.Document>
Once this is finished, you will need to enter the correct IP address and port into smartCARS.
You will need to enable "Show advanced settings" for the required settings to appear.
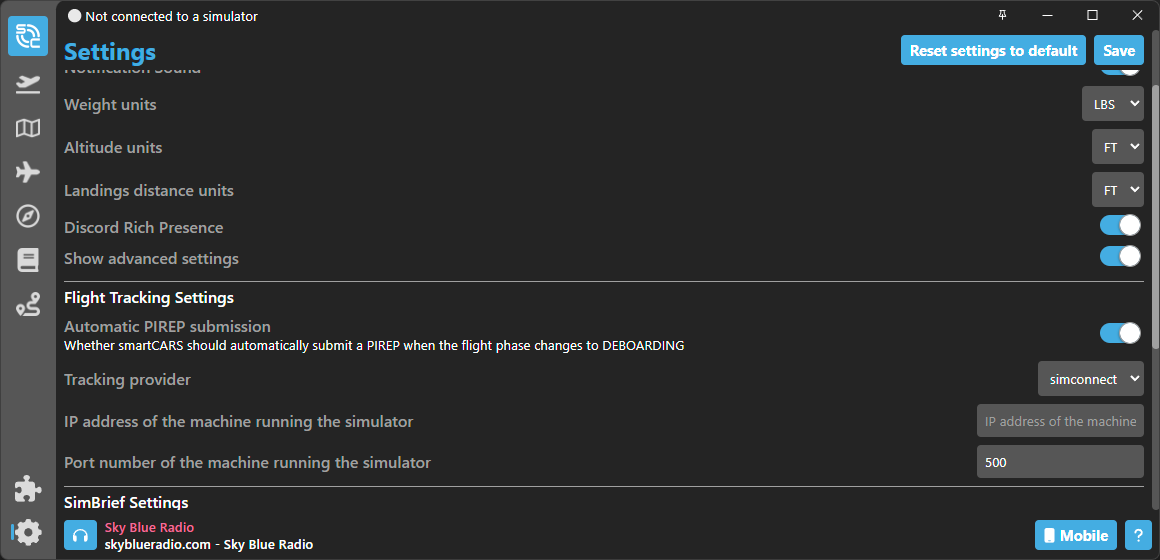
¶ For X-Plane
The steps are similar for the above, but instead of configuring SimConnect, you simply need to enter the connection information for the computer running X-Plane.

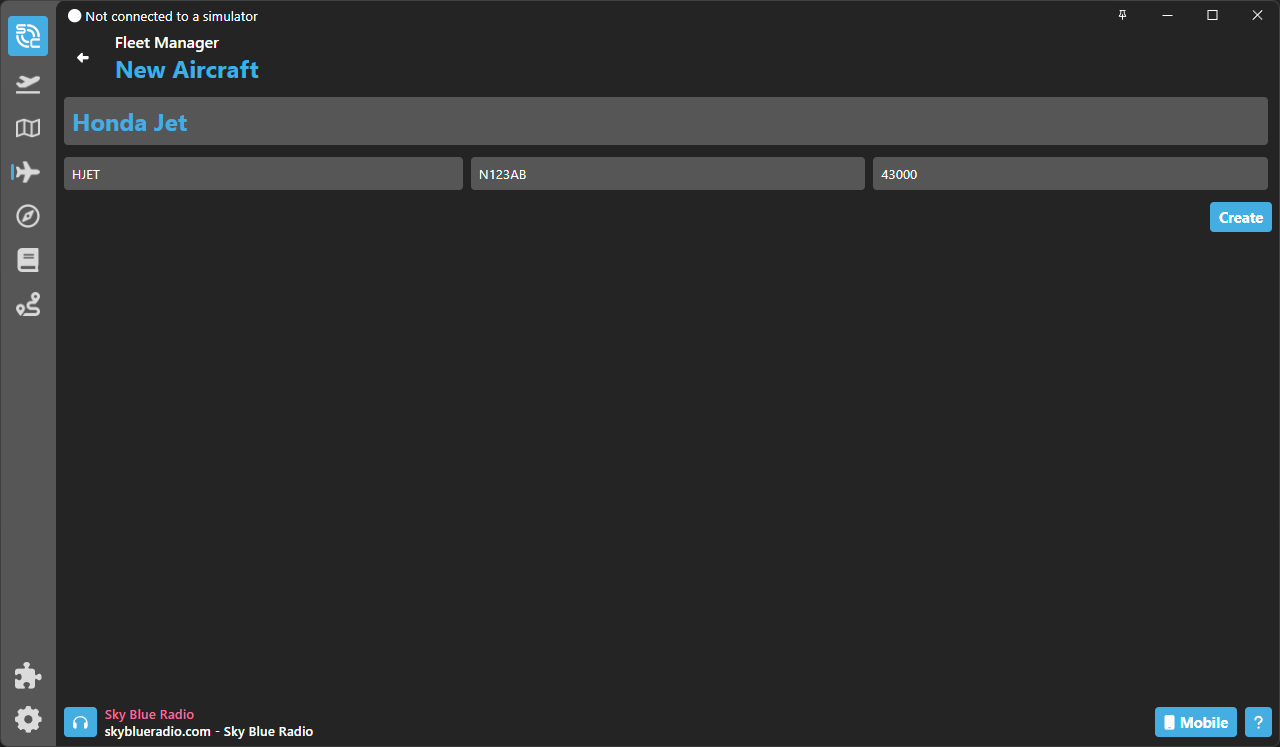
¶ Fleet Manager
smartCARS Pro users have access to an extra plugin called the Fleet Manager. This allows you to add your own custom aircraft to plan and fly flights.
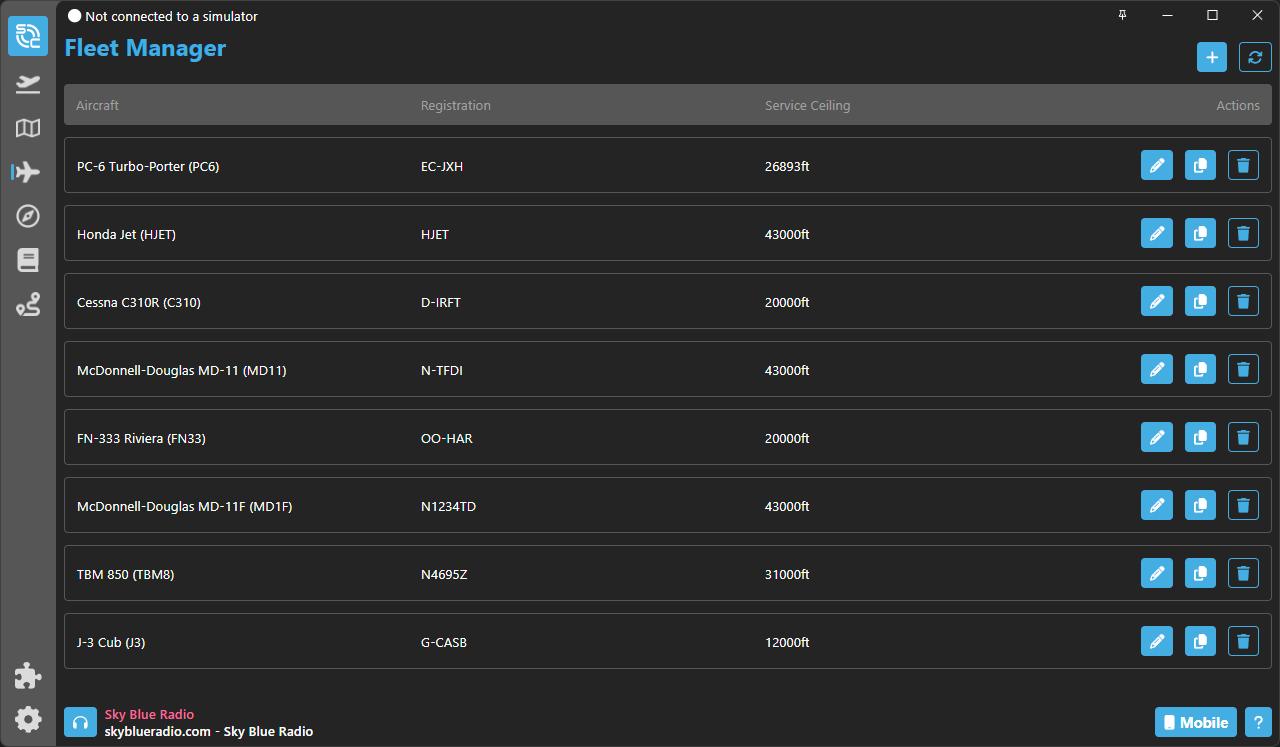
To add a new aircraft, click the "+" icon on the top right.
¶ SimBrief
For pilots who are utilising the SimBrief plugin, they can click the SimBrief logo on the left side of the application, and either retrieve the latest flight plan from Simbrief, or plan a flight directly through the application. Pilots can enter the required information on the page, before logging into Navigraph and generating a flight plan. The information will then show the basic information about the flight.
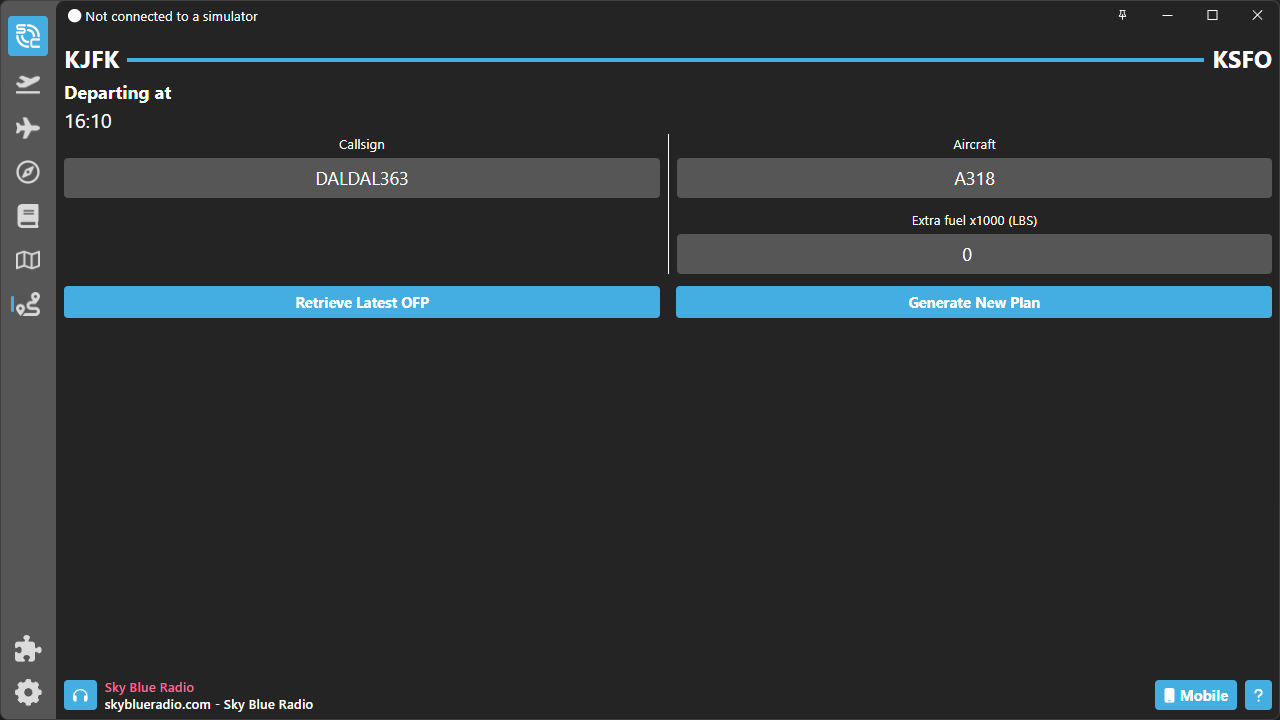
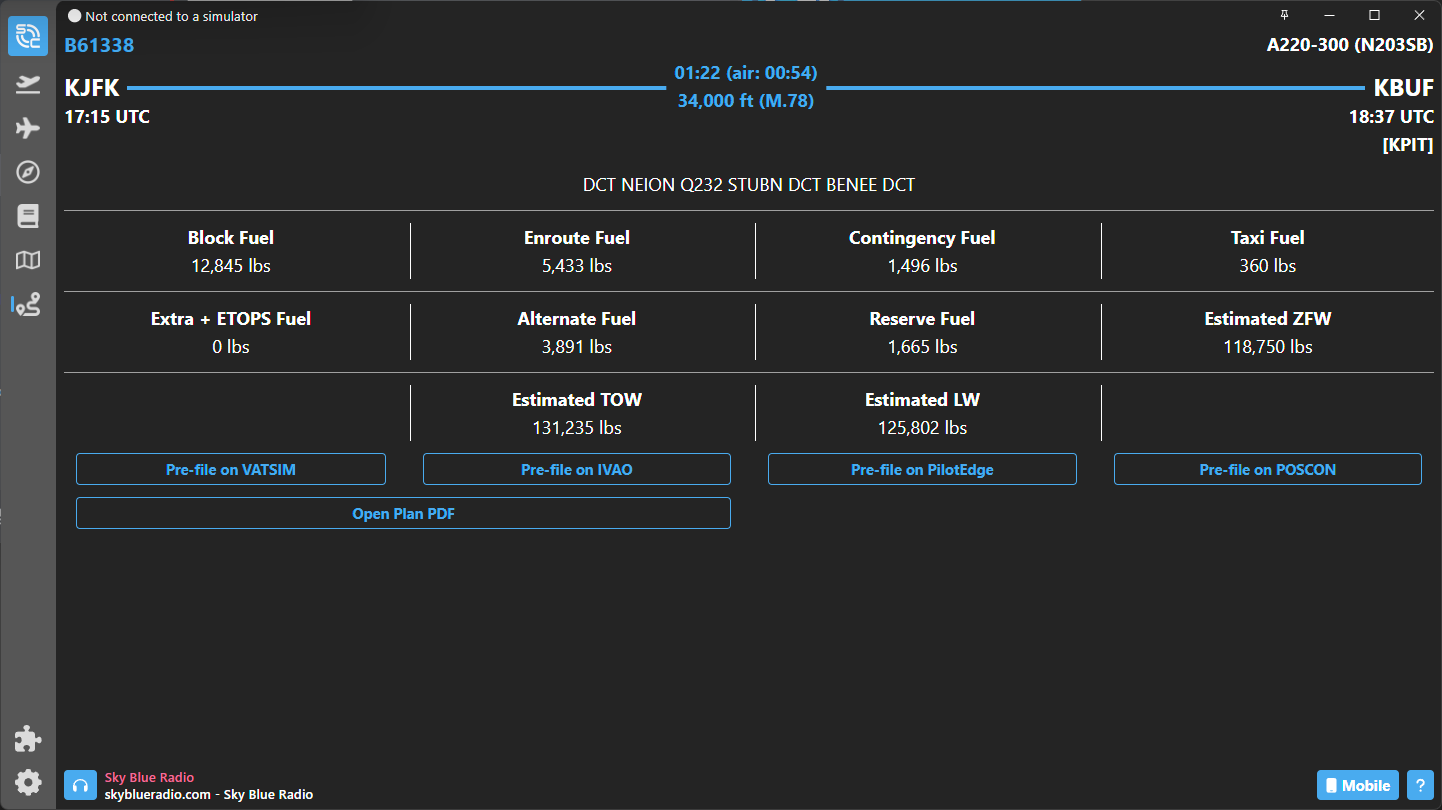
Pilots can then opt to pre-file on the network of their choice, or fly the route generated.
¶ Map
This feature now makes a return from smartCARS 2, completely rewritten from the ground up with VATSIM, POSCON and IVAO flights, as well as ATC, being shown on the map.
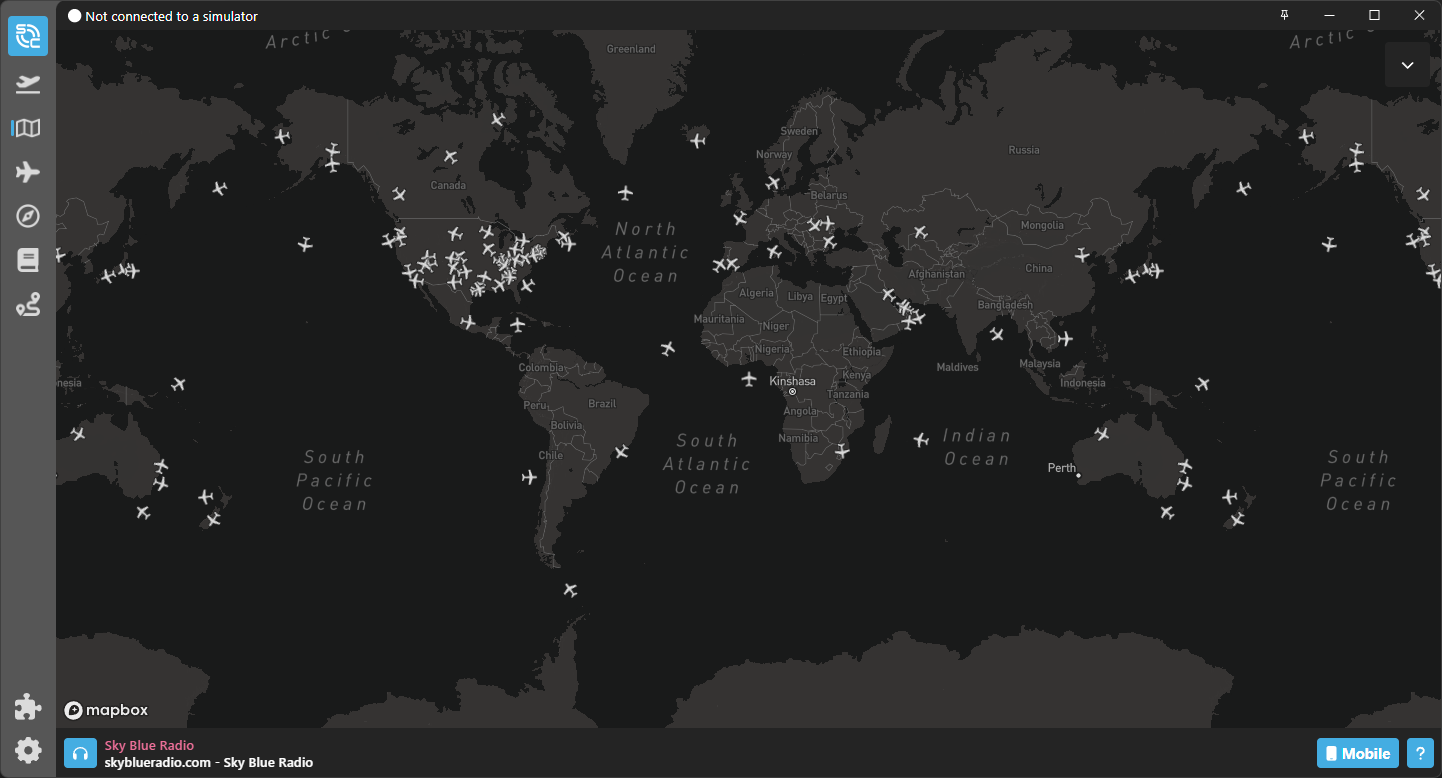
Clicking the arrow pointing down in the top right corner of the application will open up the Display Options menu.
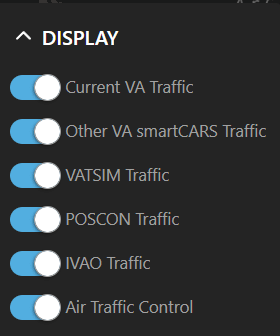
| Display Option | What it shows |
|---|---|
| Current VA Traffic | Other pilots flying for the same virtual airline as you. |
| Other VA smartCARS Traffic | Other pilots also flying using smartCARS 3 to track their flight. |
| VATSIM Traffic | Pilots flying on VATSIM |
| POSCON Traffic | Pilots flying on POSCON |
| IVAO Traffic | Pilots flying in IVAO |
| Air Traffic Control | Enables the filter for the networks selected above to show current online ATC stations. |
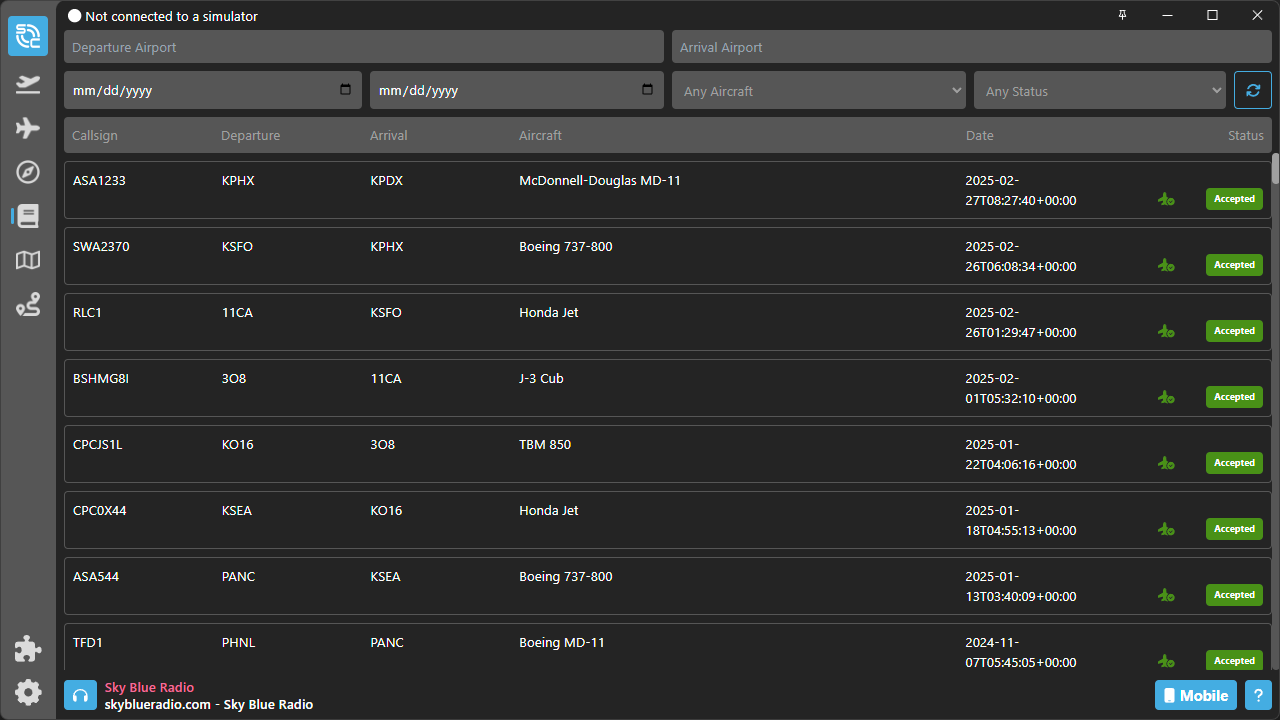
¶ Logbook
The logbook page will show all of your previous flights for your virtual airline. You can review the callsigns, departure airport, arrival airport, aircraft flown, the date of the flight and the PIREP status.
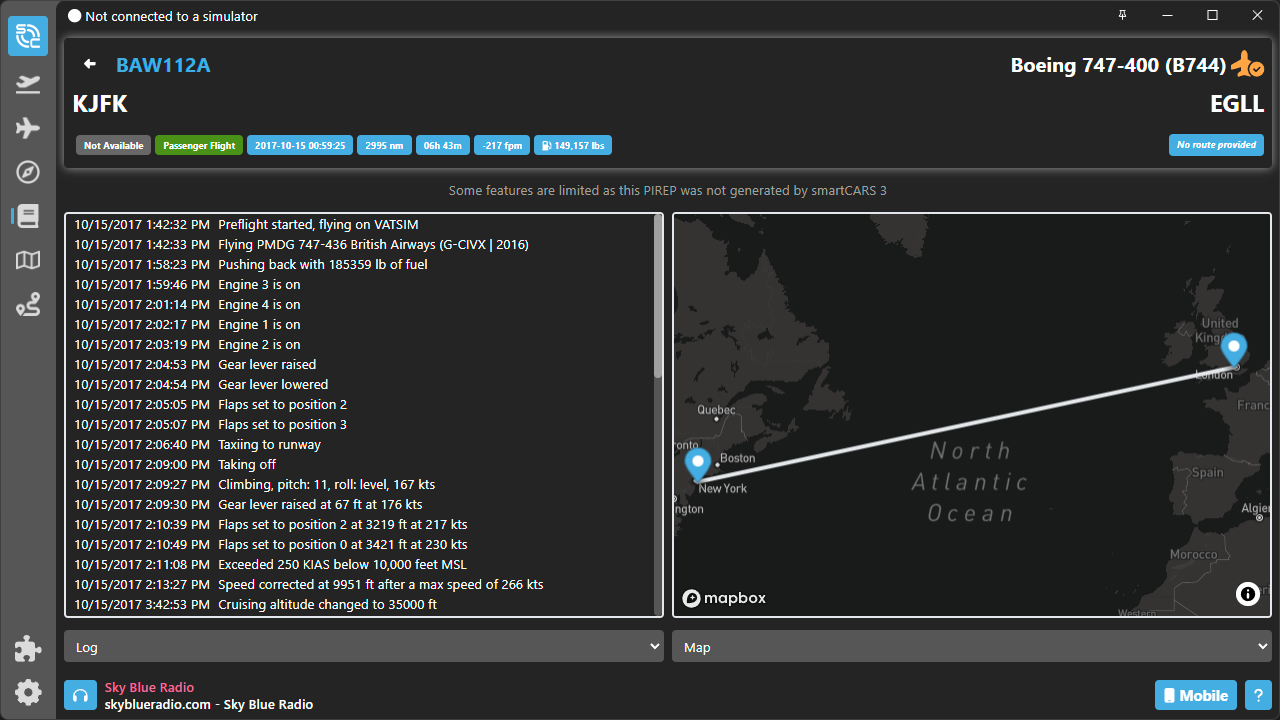
Clicking on a flight will then open up the details of your previous flight. Even if your flight was tracked in smartCARS 2, some basic functionality will still work, including the route on a map, flight information and the full PIREP log.
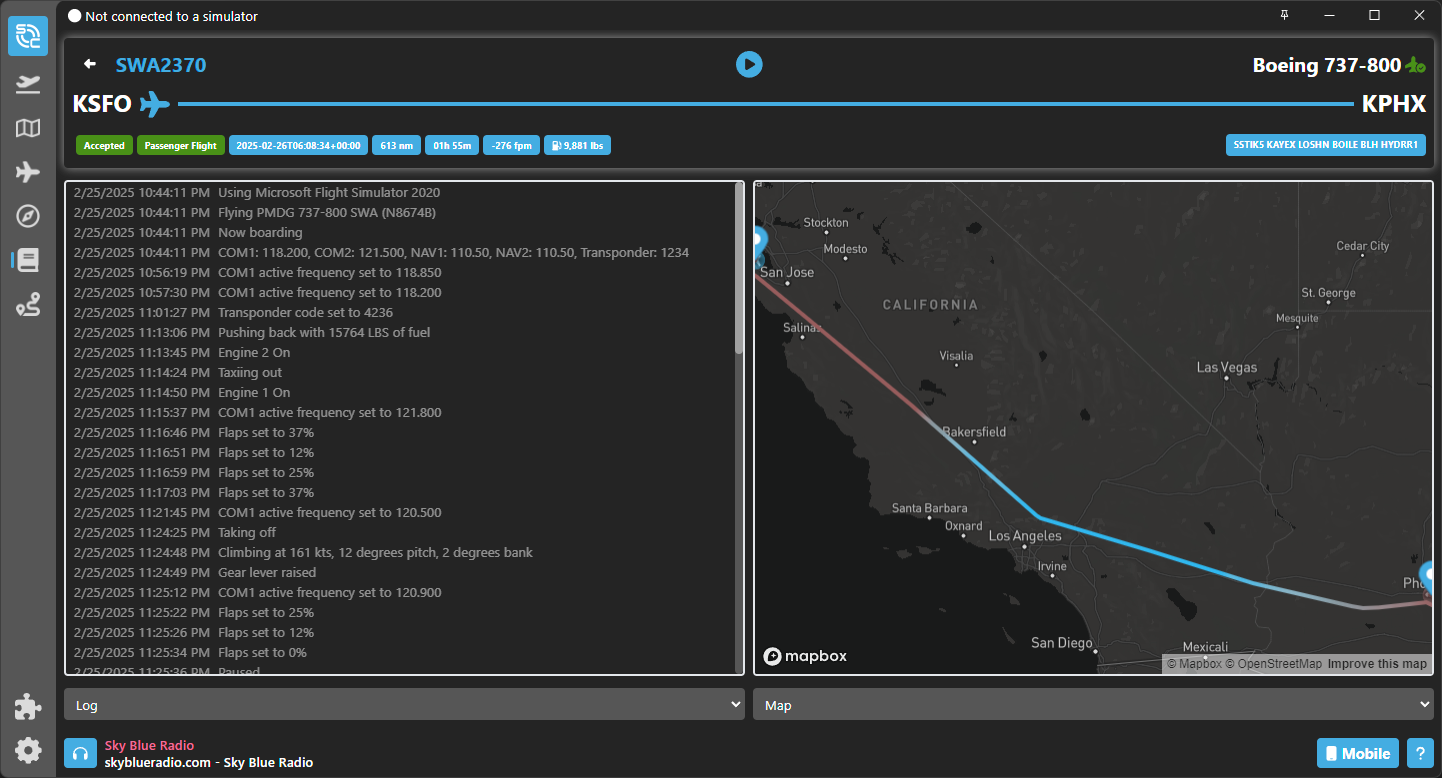
This screenshot above shows a smartCARS Pro PIREP.
¶ Plugins and Customisability
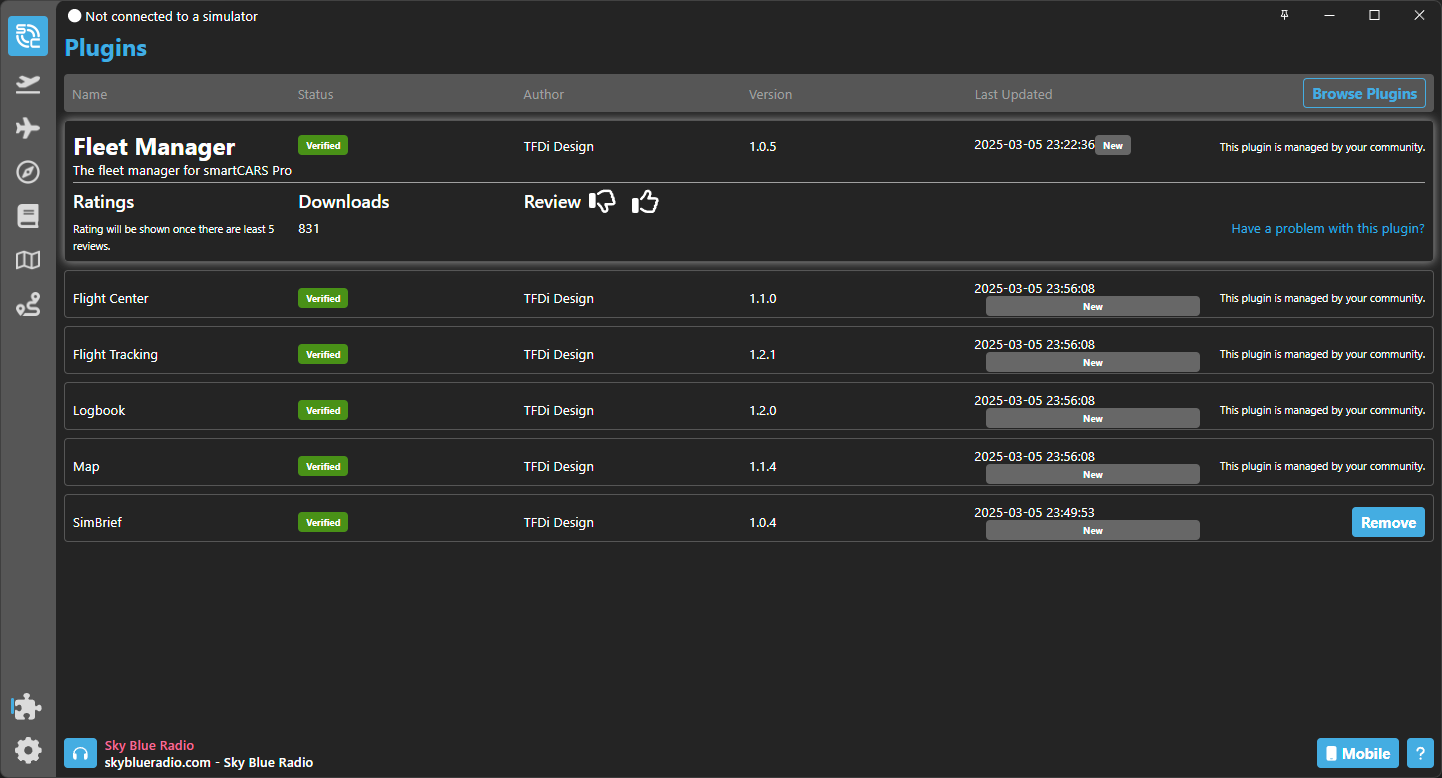
¶ The Plugins Page
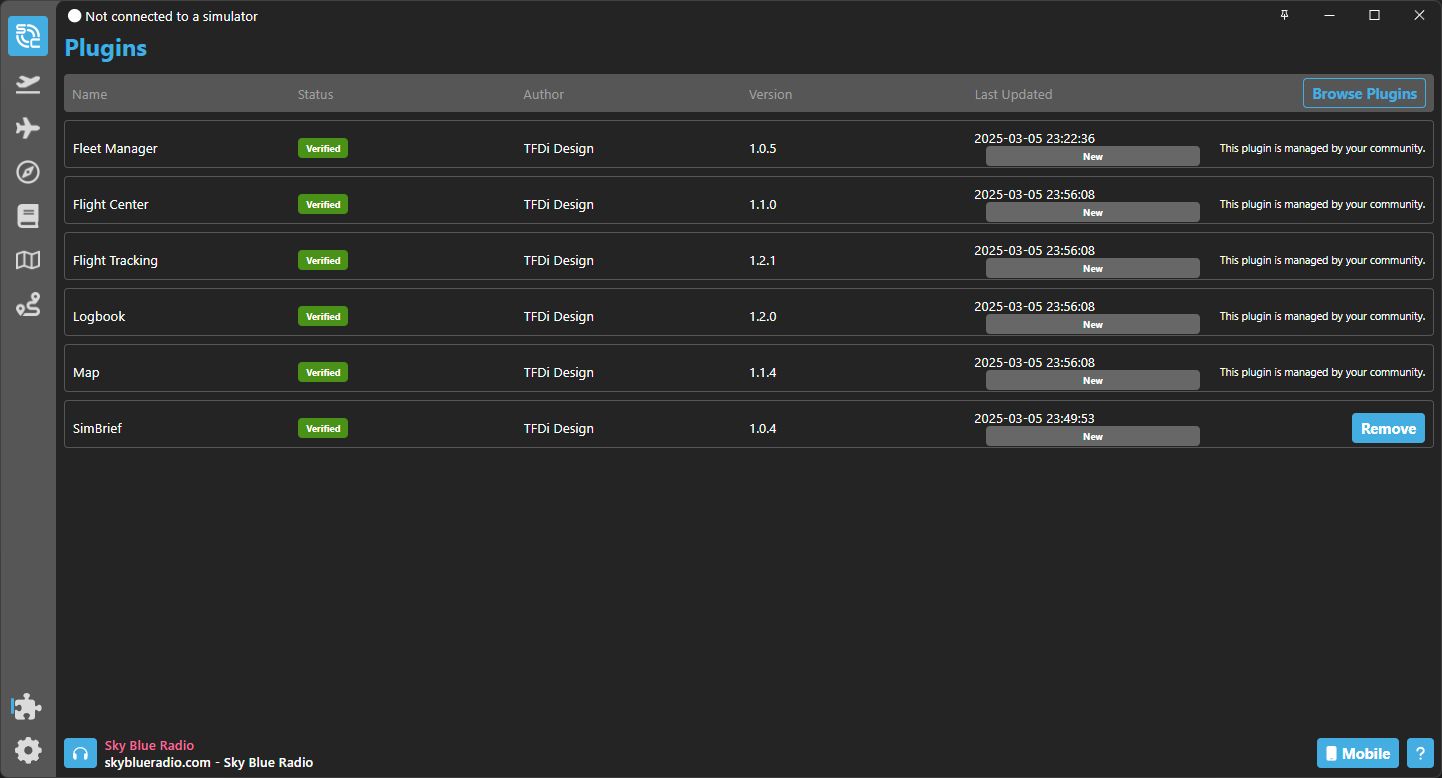
The plugins page is where you will see Verified and community plugins.
Verified plugins are either developed by TFDi Design or have had their source code reviewed and deployed by TFDi Design. They have the green "Verified" flag next to it to show you it is an official plugin for the application.
You can click a plugin to check for updates, or click "BROWSE PLUGINS" to see community and other plugins not installed by default.
Available plugins will show on the page, but you can filter by conducting a search if there are too many to see. The Simbrief plugin brings full Simbrief integration for your flight, including when bidding on a flight and reviewing your OFP within smartCARS 3.
Clicking "Add" will enable the plugin for you. Clicking "MANAGE PLUGINS" will then take you back to the page where you can review all of your installed plugins.
¶ Settings
On the settings page, you will see a handful of options to customise your application.

Plugins may also add their own settings.
Clicking "Save" will save the changes to your settings.
¶ Reordering Icons
Clicking and dragging the icons on the left sidebar will allow you to re-organise your application to better suit your needs. Just like in the task bar of Windows, you can have it set up uniquely for you.