¶ Quick Start Guide
This will be a step-by-step guide to help you through your first flight. Basic system functions will be explained where useful for day-to-day operation. More in depth information can be found in the systems guide.
¶ First load up
On first load you'll find the aircraft in a cold and dark state on the chocks and GPU connected. Settings can be found in the EFB installed on side windows. The EFB can be hidden and shown by clicking the USB-port the charger is plugged into.
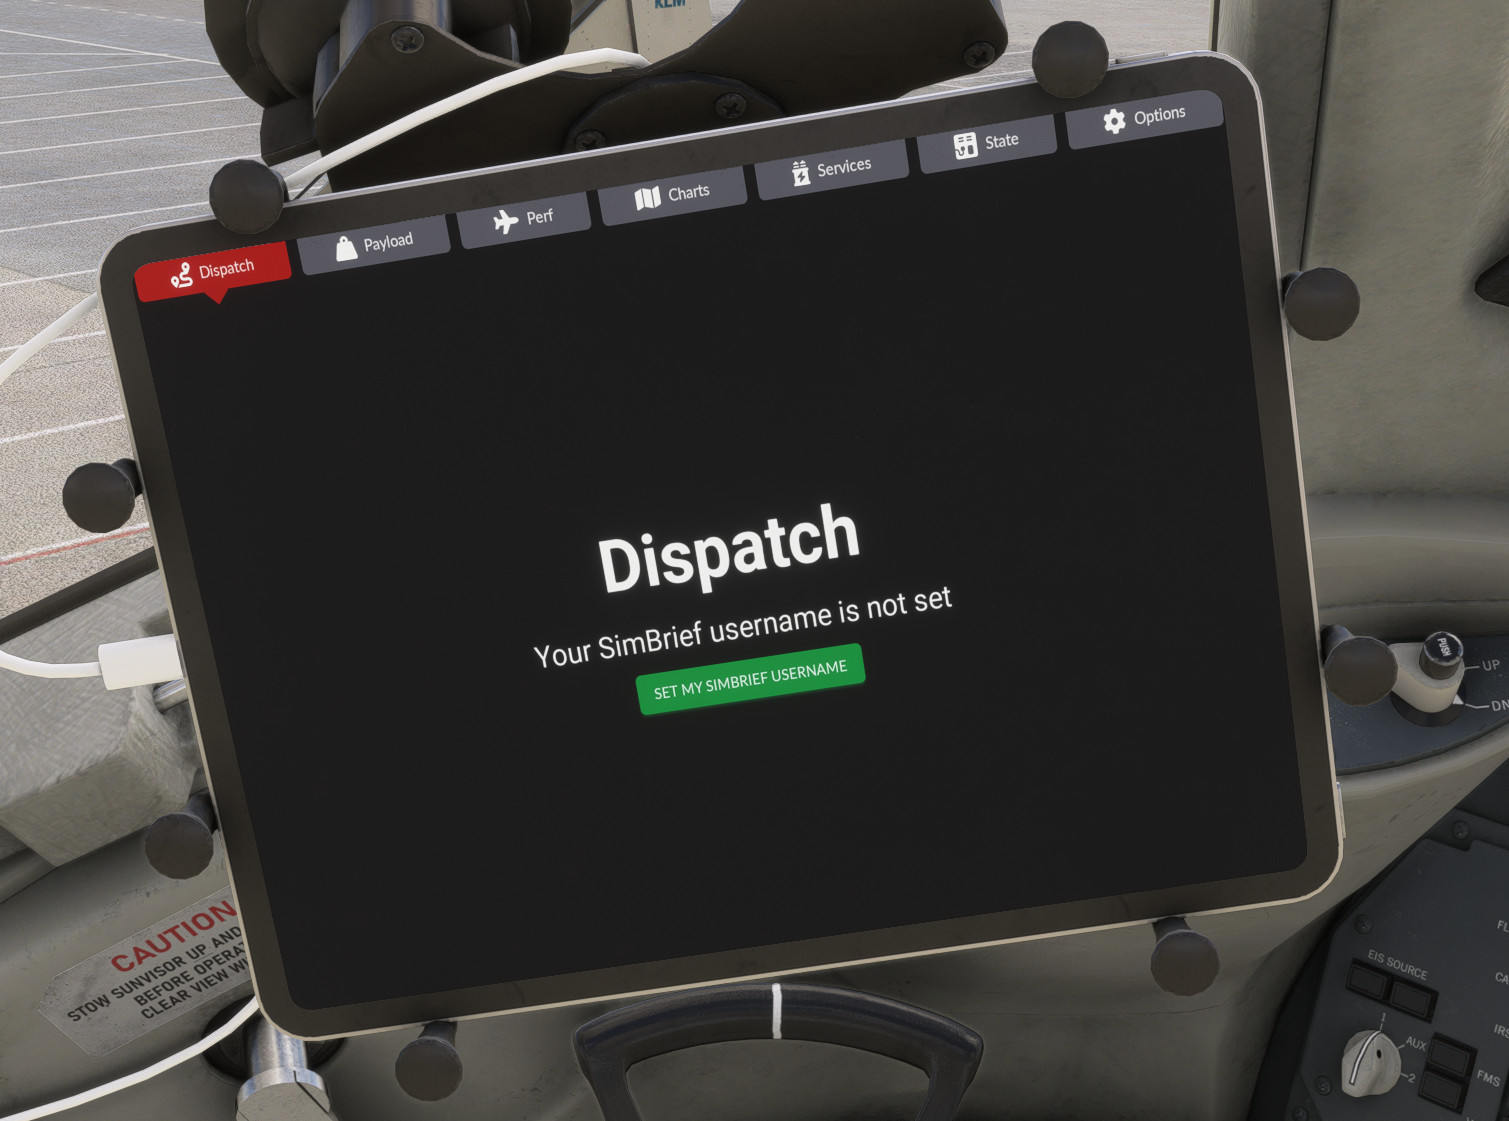
You'll be greeted by this screen on first load. Clicking the green SET MY SIMBRIEF USERNAME button will take you to the options menu.
In the general tab preferred units, interaction behavior and some aircraft options can be selected.
These settings are saved per livery, this applies to settings from all tabs.
Simbrief and hoppies acars are also saved here. These last too will be saved with the aircraft and do not need to be configured for each livery.
The systems tab gives more options for aircraft equipment, the CAWS tab for callouts and performance gives the ability to control airline settings for both thrust and balance systems as well as upgrade the aircraft with performance packages introduced during the production cycle.
For your first flight the settings in the general tab should be all you need.
¶ Preparation
Now it's time to power up the aircraft. Electrical power can be provided by:
- Turning on the battery by clicking the guarded BAT switch
- Connecting the GPU by clicking the EXT PWR switch
- Arming the emergency power by putting the EMER PWR knob to ARM
On the Electrical panel.
Next the IRSes need to be aligned this is accomplished by setting the 3 IRS switches at the top left corner of the overhead to NAV. The cargo fire test will be automatically run by doing this, the lights and firebells are normal.
Next:
- The emergency lights should be armed by setting the switch to ARM
- the nav lights should be turned on by clicking the NAV switch (no text should be displayed after)
If you have the analogue standby instruments the attitude indicator needs to be uncaged by clicking the white knob until the indicator settles on the horizon line.
The local QNH for the standby can be set here aswell.
¶ Loading
The aircraft can now be loaded via the efb.
Two options are available:
- Automatically from simbrief via the Dispatch tab
- Manually via the Payload tab
¶ Via simbrief
Navigating back to the Dispatch tab after setting up your simbrief username in the Options tab you'll now find a big IMPORT FLIGHT PLAN button. Once this is clicked you'll find this overview
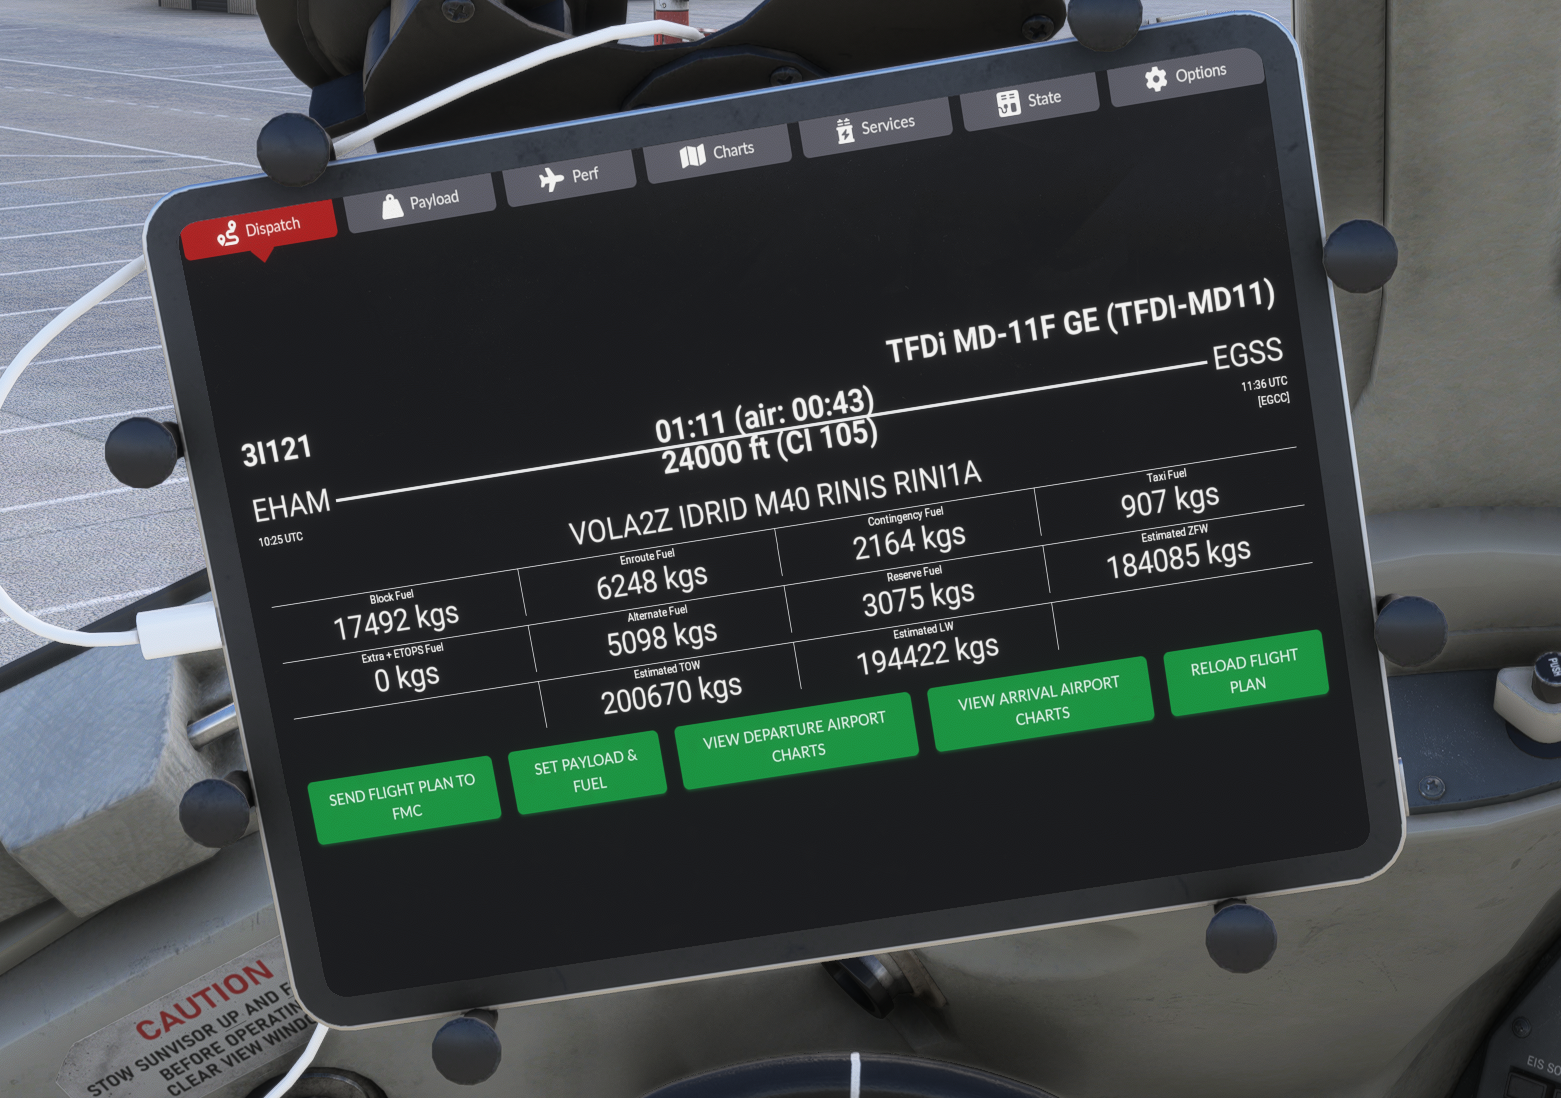
The SET PAYLOAD & FUEL button will take the fuel and ZeroFuelWeight from your simbrief flight plan and automatically apply this to your aircraft. It's also possible to upload your flightplan to the FMC you'll find a lot of the steps in the FMC setup phase will be done for you.
¶ Manually
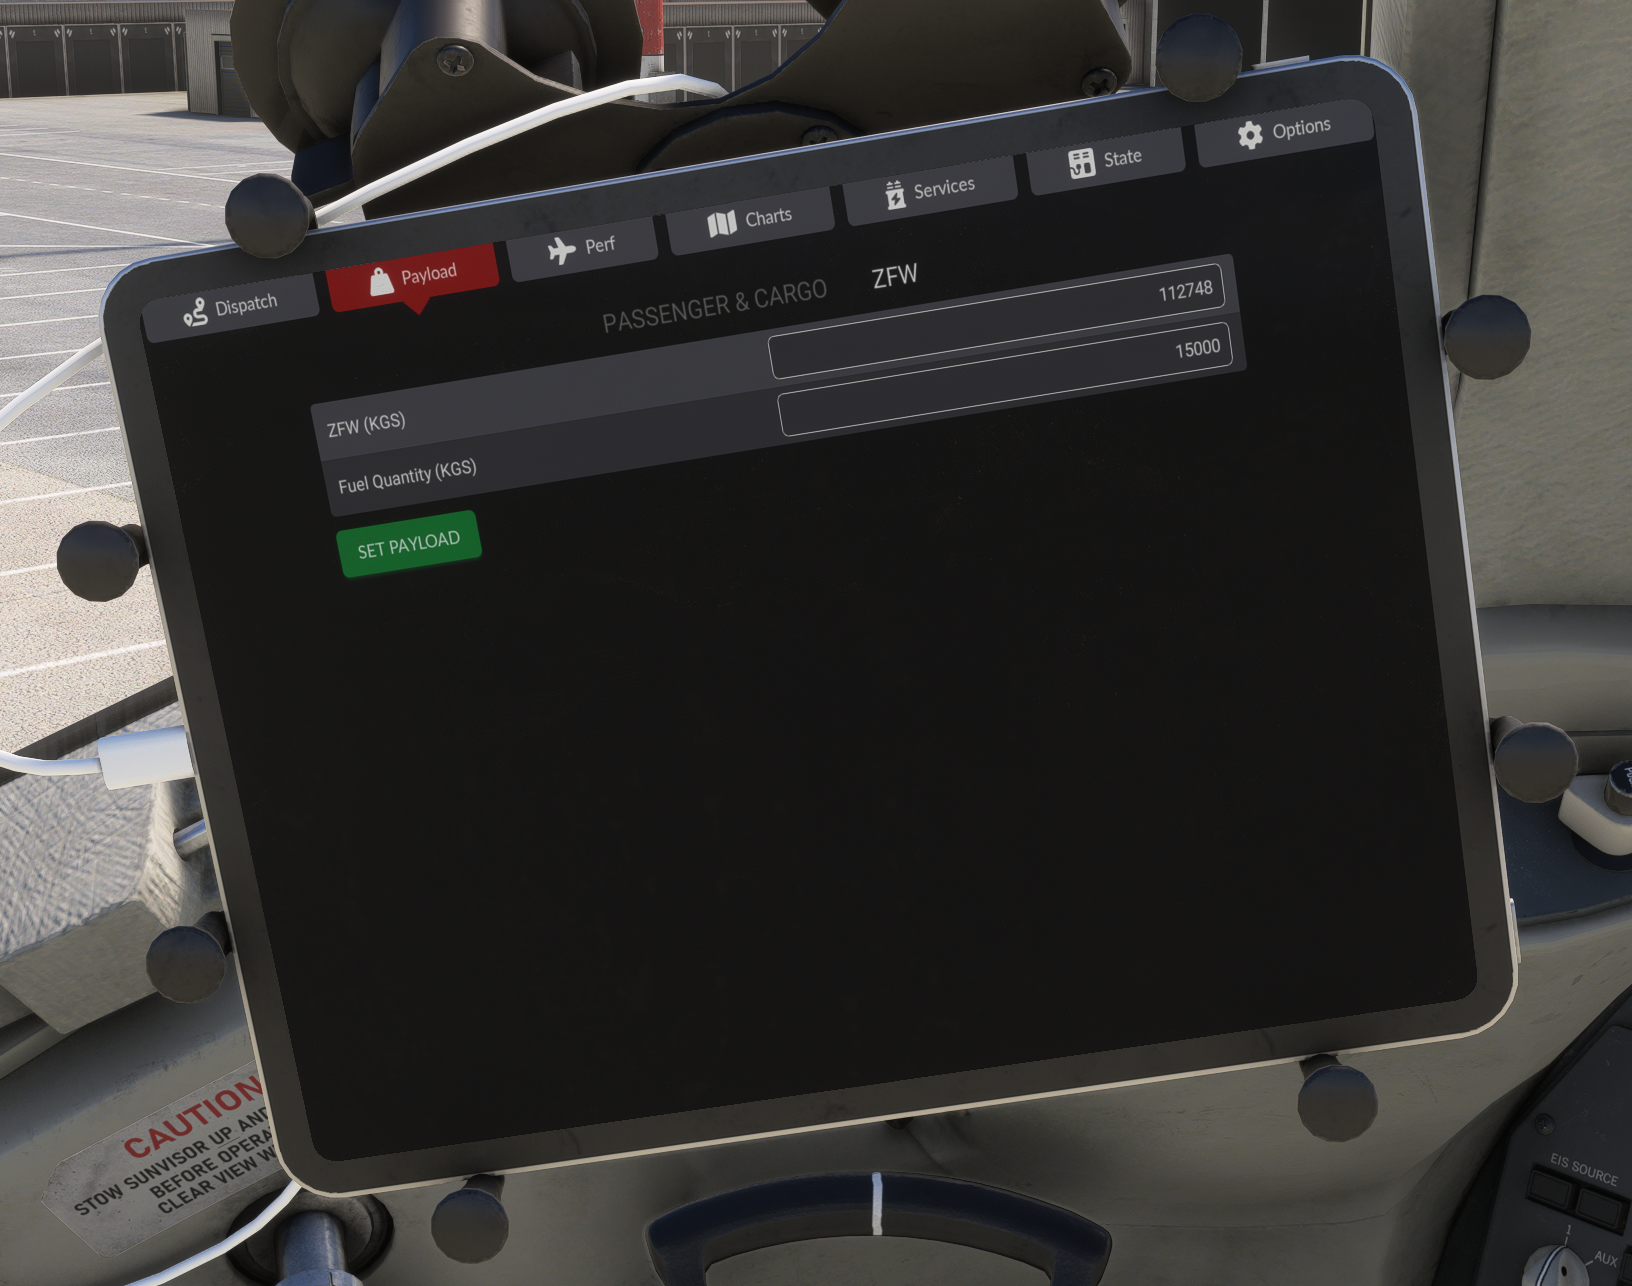
Here you load fuel and can choose to select either cargo weight (and passenger count and weight) or the ZFW.
¶ FMC setup
The MCDU menu will be open on all MCDUs on start up.
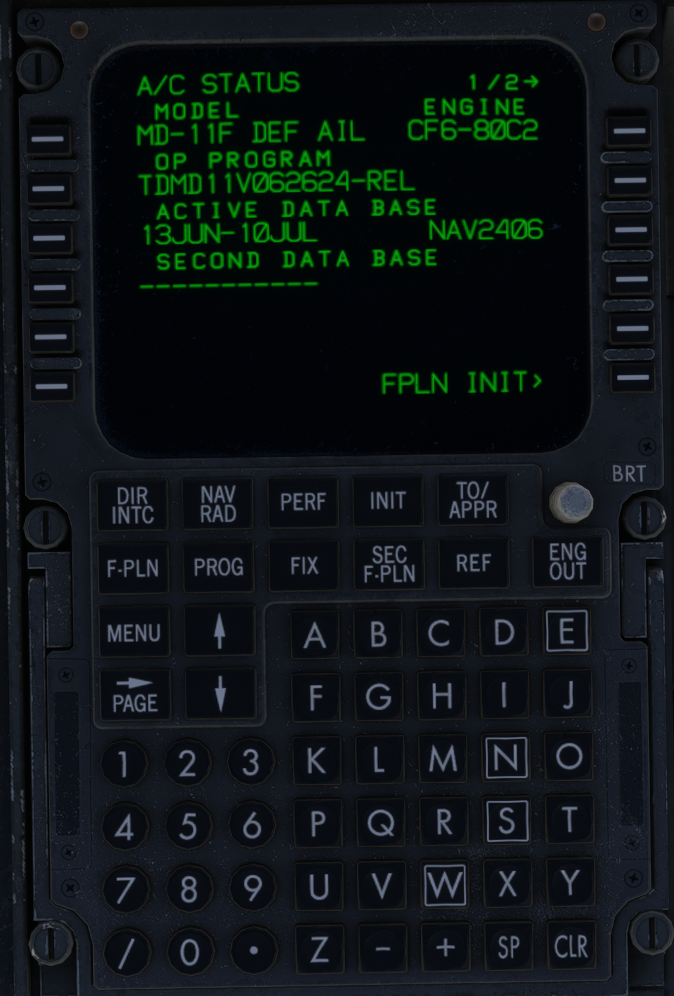
Clicking the respective FMC system will get you in the A/C status menu.
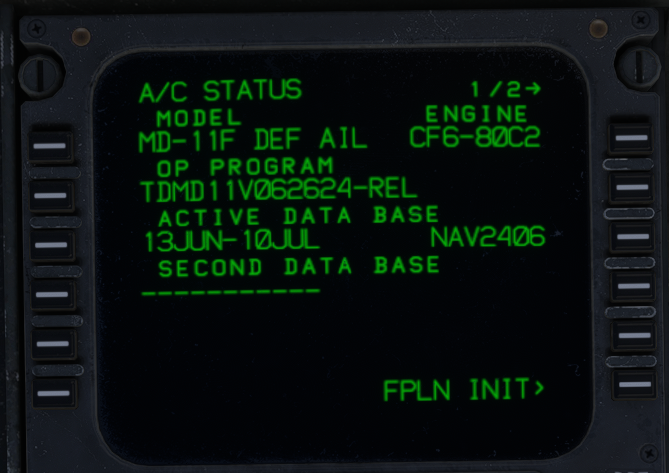
Here you can check the aircraft model, engine and active database.
¶ Flight plan entry
Clicking FPLN INIT or the INIT button on the keyboard will get you on F-PLN INIT page 1:
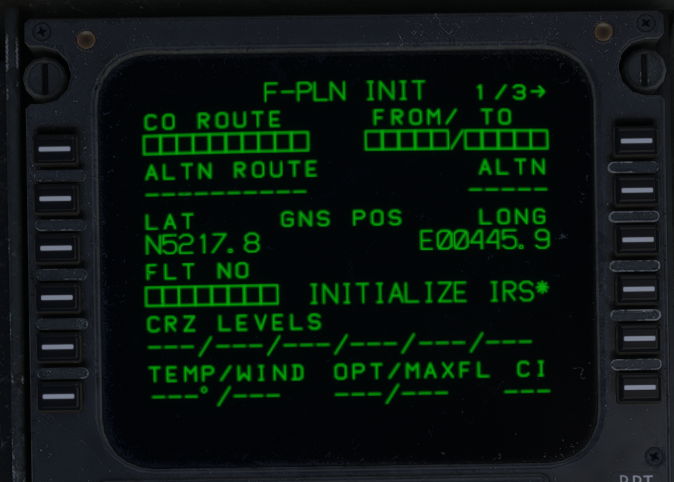
On the right side top down we want to:
- Enter the departure and destination ICAO in the format: EHAM/EGSS
- Enter the Alternate ICAO in format EGCC
- Click INITIALIZE IRS* this will align the IRS' on your present location
- Enter the cost index at CI in format 105
On the left
- Enter the callsign at FLT NO in format: TFD121
- Enter the cruise levels at CRZ LEVELS in format: 240/260/280.... Here you pre-enter all step climbs seperatated by a slash, atleast one altitude should be entered.
Clicking the F-PLN key on the keyboard will get you to the ACT F-PLN page:
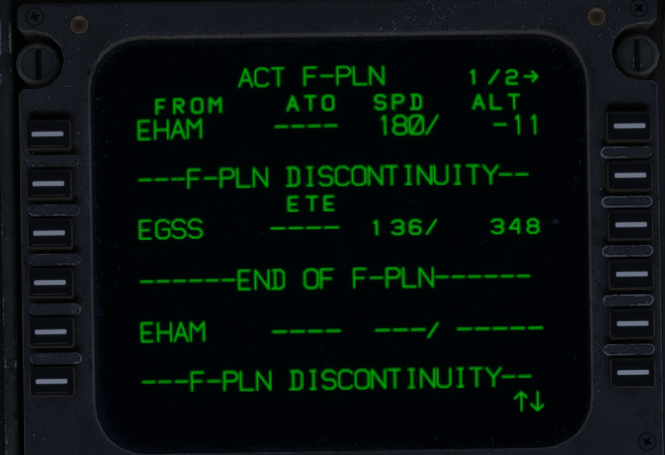
Clicking the left key of any waypoint will get you in the respective LAT REV menu. If we do this for our departure airport:
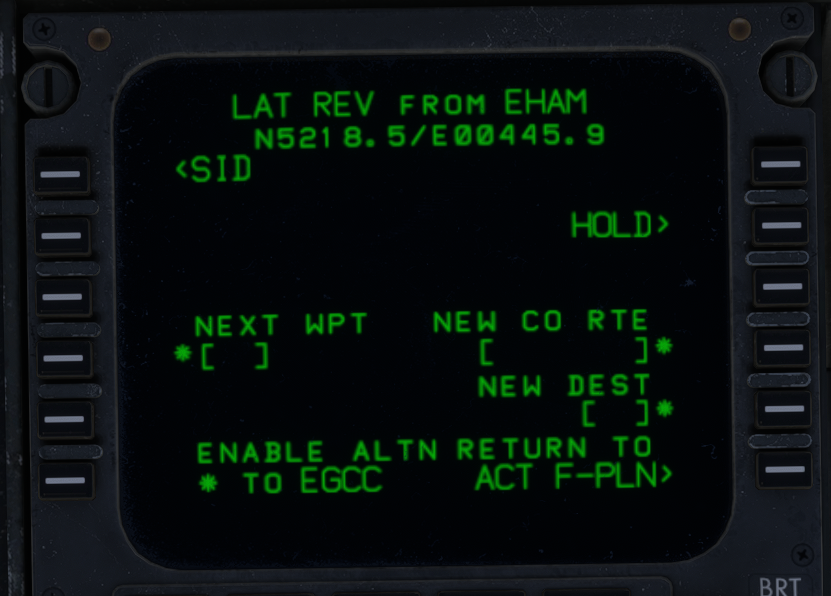
We can enter our SID by clicking SID on the top left.
Navigating using the ↑ and ↓ keys on the keyboard a runway is selected on the right and a SID on the left. Doing it in that order will filter the SID list for SIDs compatible with the selected runway.
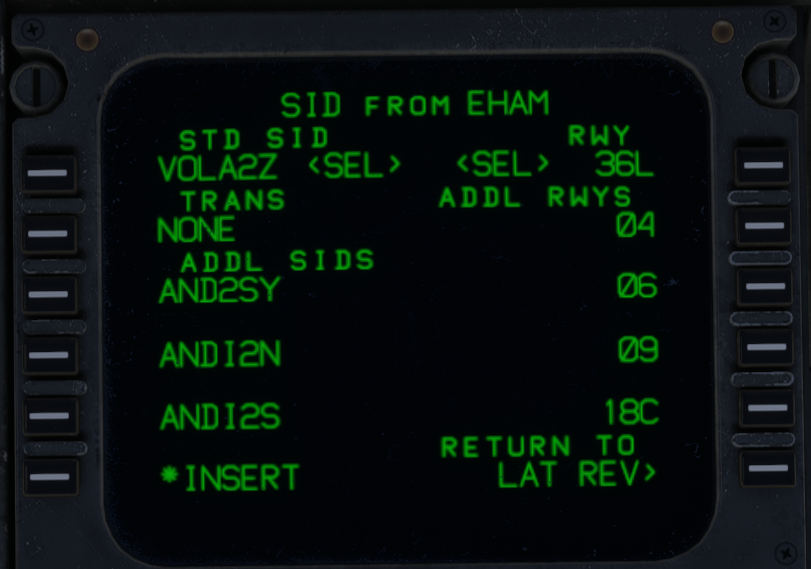
They can then be inserted by clicking *INSERT
Navigating to the LAT REV menu of the last waypoint of the SID you will now see an AIRWAYS prompt.
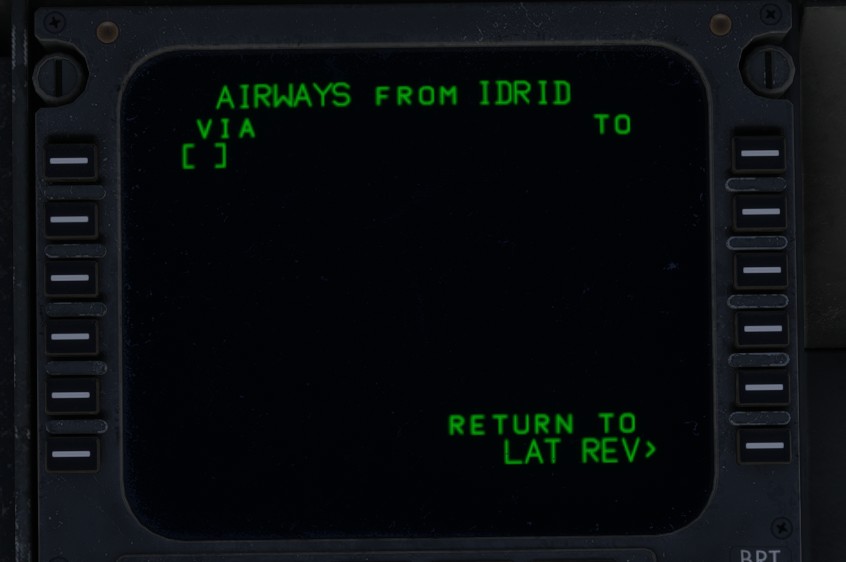
This will take you to the AIRWAYS page. Airways are entered on the left and exit points on the right. If multiple airways are entered back to back intermediary exit points need not be entered.
Direct waypoints are entered directly on the ACT F-PLAN page by typing the waypoint on the scratchpad and clicking the left key for the row where the waypoint should be entered, if entered on a waypoint the original waypoint will be pushed down to be directly after the newly entered waypoint.
STARs are entered in the same way as the SIDs but from either the destination ICAO or the last flight plan waypoint.
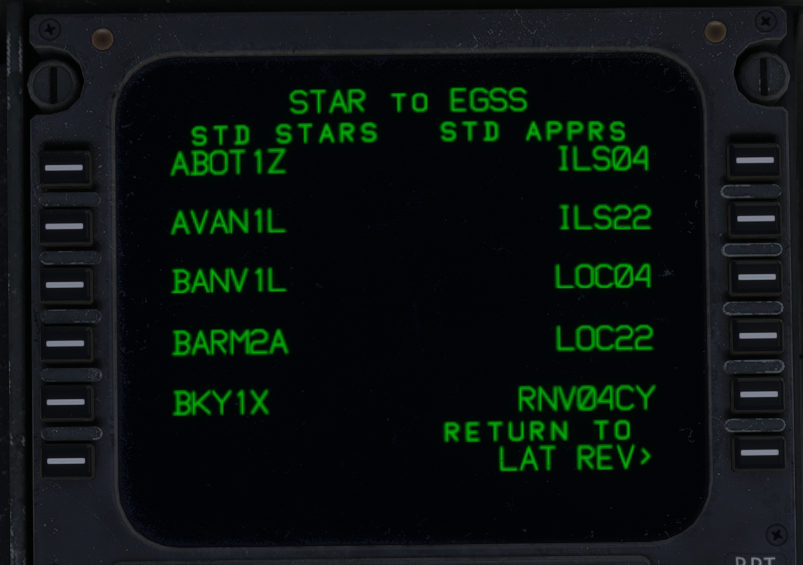
By clicking on the right key of any waypoint you'll see the VERT REV page
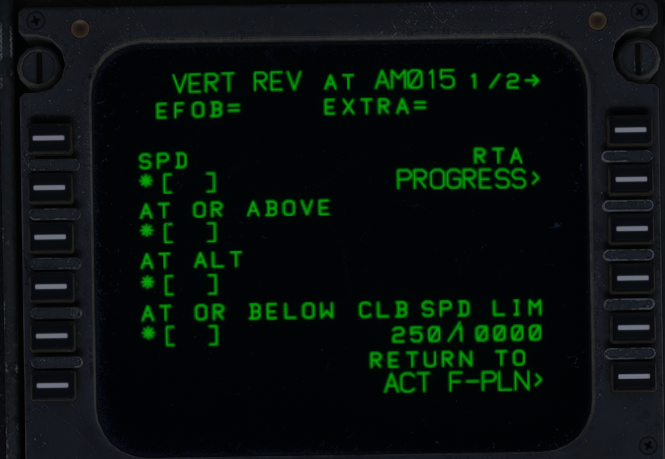
Here speed or altitude restrictions can be entered. Do note that upon entering an altitude restriction the FMC will ask whether this restriction is while climbing or descending. This can be answered by clicking the respective prompt on the bottom row.
¶ Weight initialization
After the flight plan is entered we want to initialize our weights. By clicking the INIT key then → PAGE on the keyboard you'll find the WEIGHT INIT page.
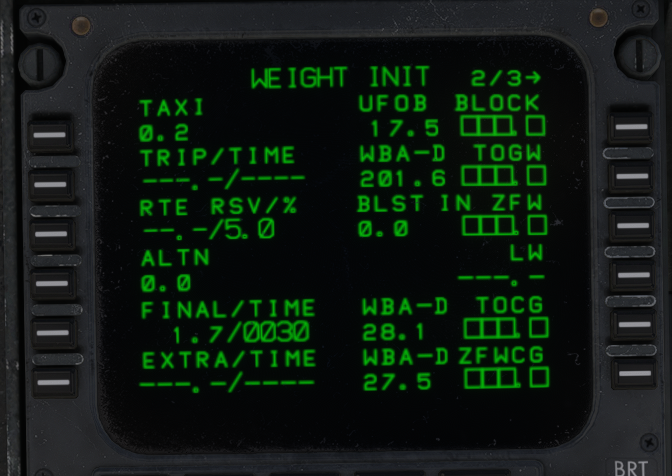
By standard the aircraft is equipped with a weight and balance system. Via sensors in the gear it will read the weight and CG of the aircraft. The readouts can be seen in small text next to the boxed entries on the right. This will allow us to entered these numbers with just 4 clicks:
- Click BLOCK to entered the current fuel as block fuel
- Click TOGW to entered current gross weight minus taxifuel as TOGW (the FMC will automatically fill in ZFW from these numbers)
- Click TOCG to enter the current CG as take off CG
- Click ZFWCG to enter the predicted ZFWCG.
¶ Take off performance
A take off performance calculator is provided in the EFB which can be found in the Perf tab.
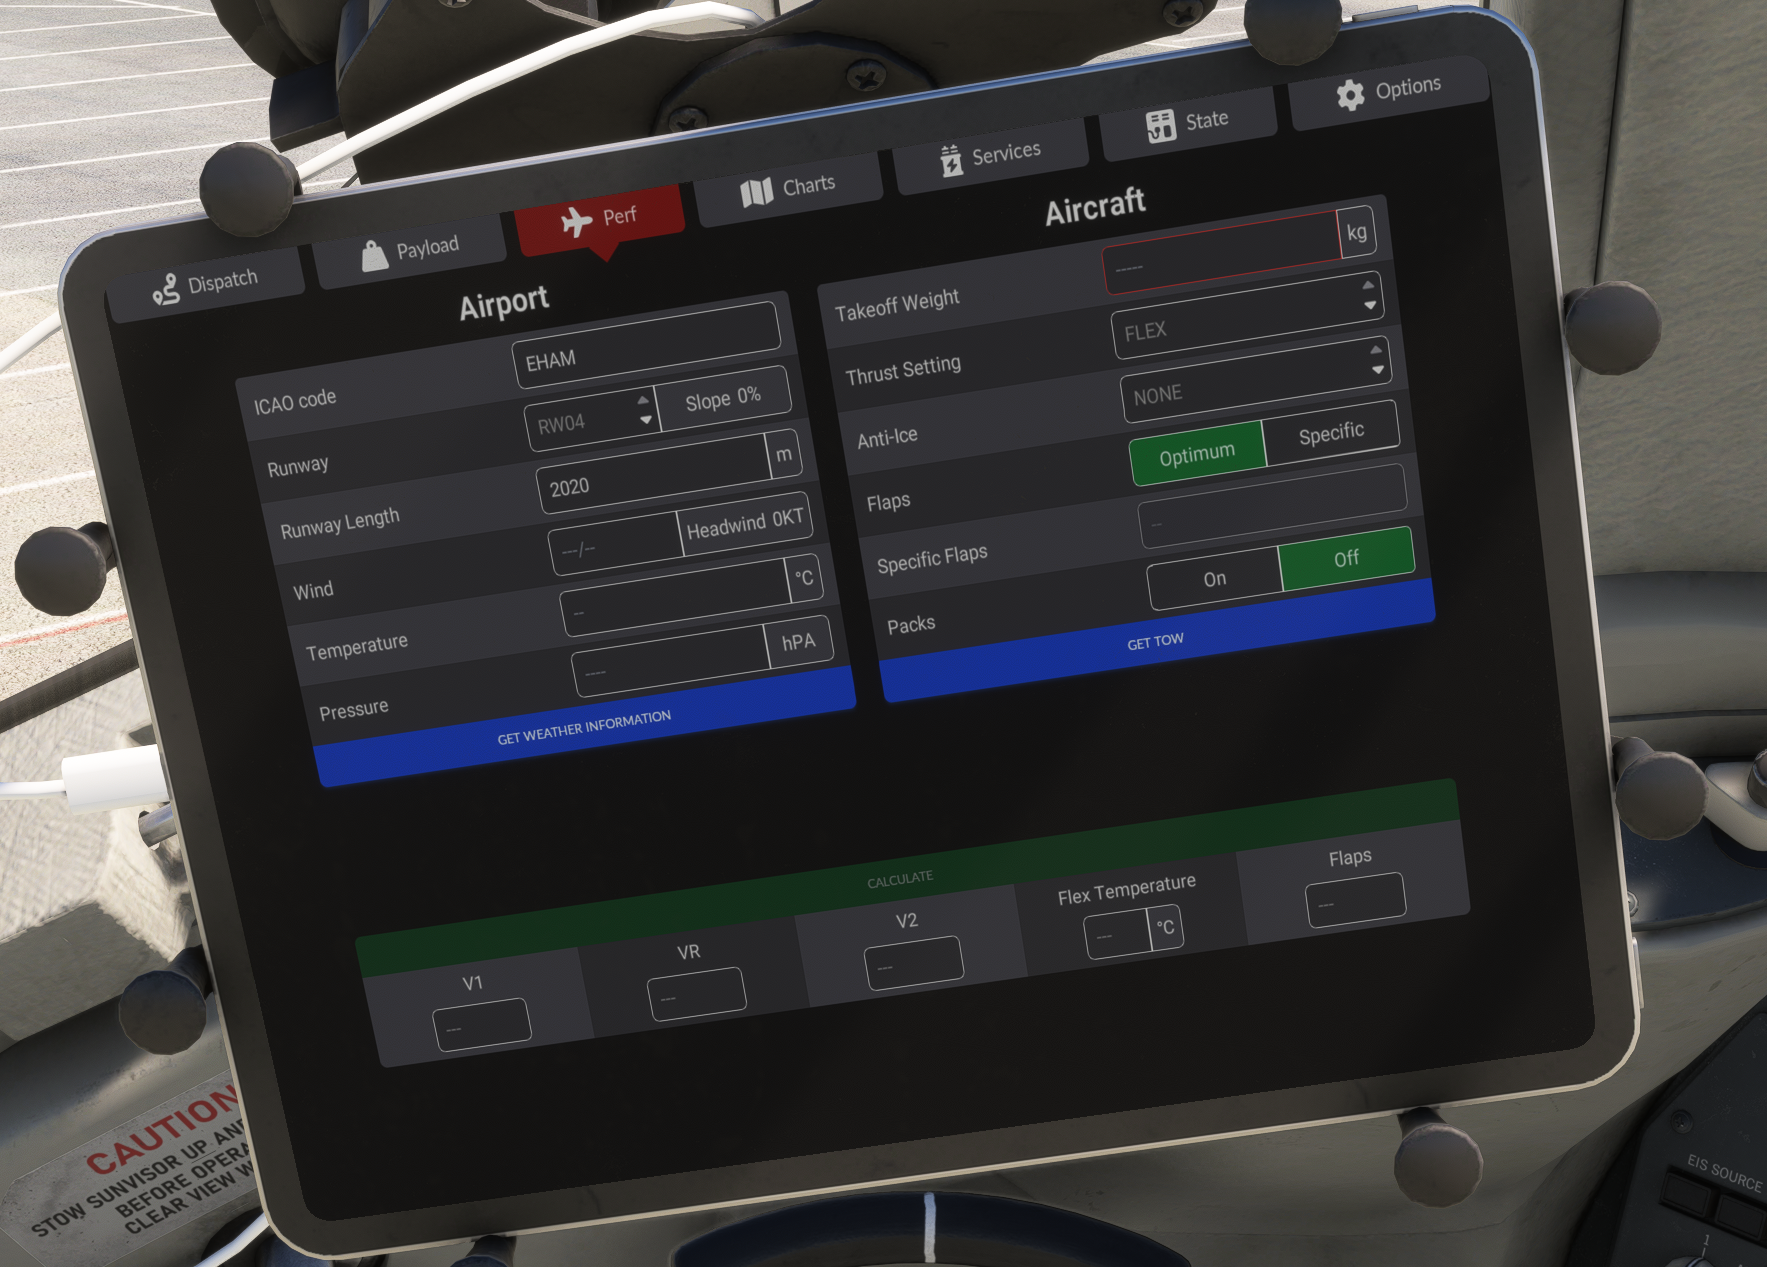
The departure ICAO code will be automatically entered.
The departure runway can be selected with the up and down arrows in the selection box.
Wind, temperature and pressure can be entered manually or fetched with the blue button.
On the right side takeoff weight can be entered or fetched with the blue button.
By default the settings of the calculator will be: thrust setting FLEX, anti-ice NONE, flaps Optimum and packs OFF.
FLEX is an assumed temperature that allows for reduced thrust take off
Optimum flaps follow McDonnell Douglas' definition "highest amount of flaps possible". Under the hood it balances the takeoff run and initial climb out. This will almost always give a high flap setting. Many airlines opt to use a specific flap setting like 15. This can be entered by clicking "Specific" then typing 15 in the box below.
The green CALCULATE button will turn bright when everything is entered and clicking this button will give you the numbers we will need in the FMC.
Click the TO/APPR button on the MCDU keyboard
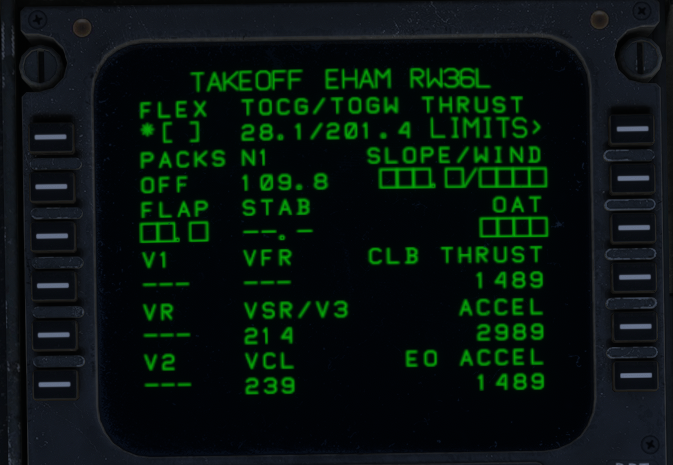
When using the calculator as explained before enter the following:
On the right:
- When using EFB Vspeeds slope and wind can be left zero in format 0/0.
- The outside air temperature at OAT in format 15C or 59F for celsius or fahrenheit respectively.
On the left:
- The FLEX from the EFB.
- The FLAP either calculated by or choosen on the EFB.
- V1, VR and V2 from the EFB.
¶ Before Start
- Set the local QNH on both sides via the BAROSET knob on the ECP
- Set the speed window on the FCP to 250 or VCL (seen at the bottom of the TAKEOFF PERF page) whichever is higher.
- Set runway heading on the heading window and pull on the knob once.
- Set initial climb altitude on the altitude window.
- On the overhead on the ELEC panel click APU PWR this will automatically start the APU and connect the generator. After we have started the engines it will automatically shut down the APU. The APU is available when both ON and AVAIL are no longer flashing.
- Disconnect the GPU by pressing EXT PWR.
- Set the Dial-A-Flap to the chosen flap.
- Set the [Passenger Sings] to ON
At this point we can remove all ground equipment and call for pushback.
The ground equipment (GPU and chocks) can be removed via the Services tab in the EFB.
- Open the APU Bleed
- Select an Engine Ignition System
- Turn on the Beacon Light
- Turn on the AUX Hydraulic Pump 1
¶ Start Up
During the push after the brakes are released or while on stand for a taxi-out-stand the engines can be started. The standard order is engine 3 then 1 then 2. This is done as follows
- Pull the respective Engine Start Switch
- Watch the N2 of the respective engine rise
- At 15% N2 set the respective Fuel Cutoff Lever to ON
Repeat for each engine.
¶ After start
After the start we will clean up the systems for the automatic operation to take over and prepare for take off, this is done as follows:
- Close the APU Bleed (this will initiate APU shutdown)
- Set the Flap handle to the dial-a-flap notch
- Arm the Spoilers by clicking on the handle
- Set the Auto Brakes to RTO
- Set the trim to the setting provided on the TAKEOFF PERF page
- On the FCP click the NAV and PROF button
You can now Taxi to the runway
¶ Before Take Off
Before we roll onto the runway we want to complete a last few steps
- Set the landing lights to ON
- Turn on the high intensity lights
- Turn on the transponder and set it to TA/RA and turn on alt reporting
- Verify we have a good take off configuration by the presence of a green box on the EAD
¶ Take Off
The setup we've done in the steps before will allow for a fully automated takeoff on the planned NAV route following the vertical profile. For deviation from this refer to the Flight Control Panel.
- Upon entering the runway, arm auto flight by clicking AUTO FLIGHT on the FCP once.
- Set takeoff thrust by slowly advancing the throttles. At about 70% N1 (or equivelant EPR) the ATS will take over and set take off thrust.
- At Vr rotate the aircraft smoothly to 18-21 degrees of pitch. At around this pitch fly to hold speed at Vfr. The autoflight system will have auotomatically set this as the speed target and the flight directors should help you follow this.
- At acceleration altitude the speed target will automatically be raised to 250 or Vcl whichever is higher.
- At 10 knots above the FR tag the flaps can be raised.
- At 10 knots above the SR tag the slat can be stowed.
- The autopilot can be enganged above 400 feet AGL.
If T/O THRUST mode is accidentally engaged or must be manually disconnected, you must disconnect autothrottle by pressing the ATS disconnect buttons on the throttles, flipping both AFS OVRD paddles down, or by pressing the simulator "autothrottle toggle" button (
SHIFT+Rby default).
¶ After Take Off
We will clean up the aircraft for the climb and cruise.
- Disarm the spoilers
- Set the Auto Brakes to OFF
- Turn off the Landing lights
- Set the Dial-A-Flap to 15 degrees
From this point forward the aircraft will fly automatically to the destination.
¶ Before Descent
- Dial down the altitude window. At the Top of Descent point the aircraft will automatically descent on the path.
- Decide on a landing flap. By clicking the TO/APPR button on the MCDU you can see the configurations on the Approach Perf page. Here you can also select flaps 50 for approach.
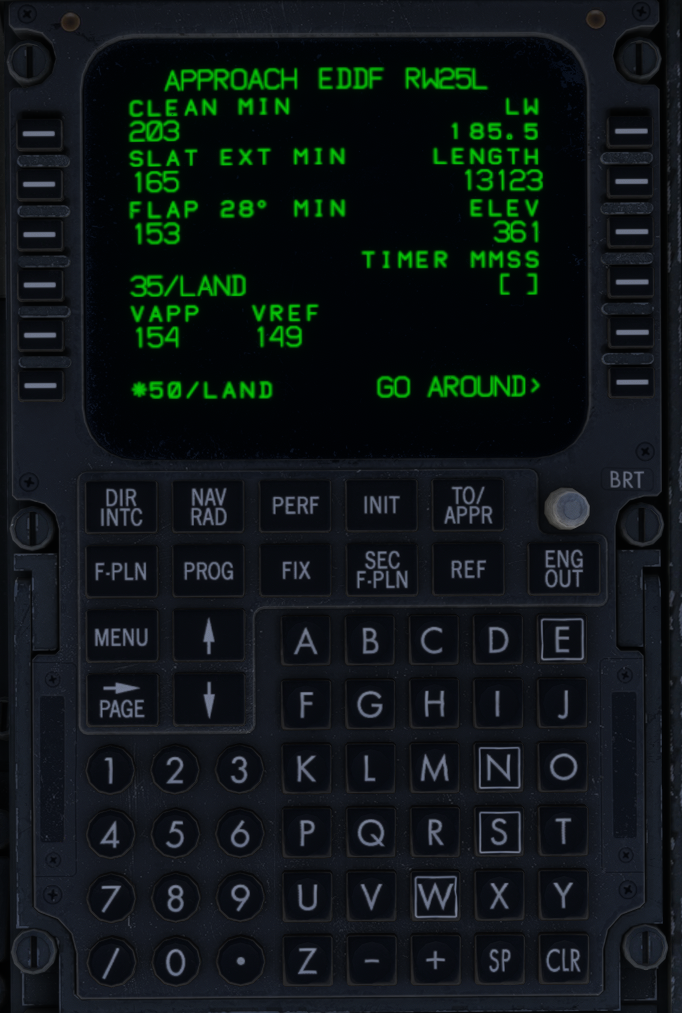
- Set the minimums on the ECP
¶ Descent and approach
During the descent the aircraft will follow the vertical profile down. The FMS speed system will fly it's econ speed or reduce speed to maintain speed restrictions. When closing in on the arrival runway the FMS speed will start to slow the aircraft down in steps. These serve as a nice moment to start extending slats and flaps.
If an ILS approach is selected the aircraft will auto tune the frequency (approximately 25nm from the runway).
When intercepting the ILS the approach auto flight mode must be engaged by pressing APPR/LAND. This will make the auto flight system capture the localizer and glide slope.
Then:
- Configure for landing by putting the gear down and the flaps to 35/50 (whichever chosen)
- Arm the spoiler
- Set the ABS to min, mid or max
- Confirm correct config by the presensce of a green box on the EAD.
¶ Landing
Landing the MD-11 can be tricky, by following these steps you can ensure a safe but firm landing:
- Disengage the auto pilot
- Follow the flight directors down the ILS or NAV and PROF path to the runway. (The ATS can be disengaged or left engaged whichever you prefer)
- At around the 50 feet callout slowly idle the throttles (the ATS will do this if engaged)
- At around the 40 feet callout slowly and softly flare without stopping the descent completely. This ensures a firm and timely touchdown. It's easy to overflare the aircraft and float or flare late and have an hard landing.
- After touchdown deploy the reversers, if an axis is used wait for the reverser to show deployed on the engine SD before moving beyond idle
- Derotate the plane, the ABS needs the nose gear on the ground to work fully, this might initially require some forward pressure on the yoke.
¶ After Landing
- Stow the spoilers
- Retract flaps and slats
- Turn off High Intensity lights when exiting the runways
- Start the APU by clicking the APU GEN
- Set the trim back to 3.0 unit ANU
- Clear the flight plan by hitting INIT on the MCDU keyboard
¶ Parking
Once back on stand:
- Set the parking brake
- Turn off the engines by setting the FUEL switches to OFF
- Turn off the Beacon light and landing or taxi lights
- Connect ground services (GPU, Chocks)
- Connect EXT PWR
- Turn off the APU by clicking APU GEN
The aircraft can now be deboarded.